Quick Summary:
- Photograph each side, wheels, windscreen, and the dashboard showing mileage clearly.
- Confirm fuel level, mileage, and any pre-authorisation notes before exiting.
- Match registration details, VIN, and licence plate to the rental agreement.
- Test lights, wipers, air con, and parking brake before leaving.
Picking up a vehicle for car hire in Orlando can feel like a sprint, especially after a flight and the first rush of Florida heat. Taking five to ten minutes to do a calm, methodical check protects you from being blamed for existing damage, helps you understand the car’s condition, and avoids confusion about fuel and mileage later.
This guide focuses on what to photograph and what to check before you drive off, including the paperwork details that should match the actual vehicle. If you are collecting at the airport, it is also useful to know the process for Orlando MCO airport collection so you can plan enough time for these steps.
1) Take the right photos, not just “a few quick snaps”
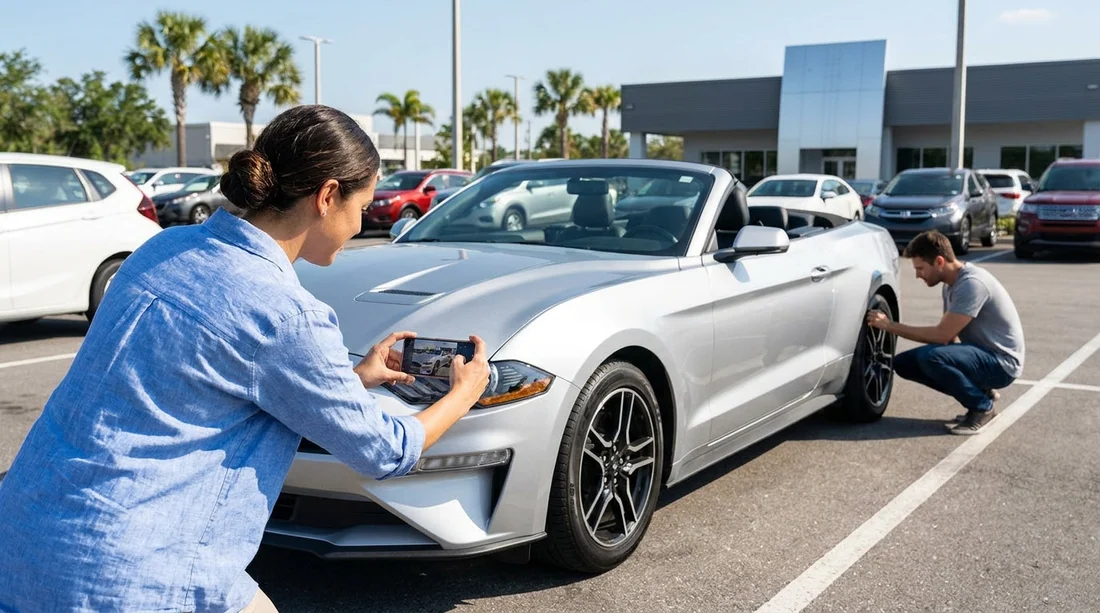
Your phone camera is your simplest evidence. The aim is to create a clear record of the car’s condition at handover, with timestamps and enough context to show where damage sits on the vehicle. Ideally, take photos before the car moves from the bay, in good light, and with the car clean enough to see marks.
Start with wide shots for context. Walk around the vehicle and take a wide photo of each side, plus front and rear, keeping the whole car in frame. These establish overall condition and help show that close-ups relate to this specific car.
Then take close-ups of high-risk areas. Focus on: bumpers, lower side skirts, wheel arches, alloy wheels, door edges, mirrors, and the boot lid edge. In Orlando, kerb rash and scuffs are common on rental fleets, so photograph each wheel face straight on, then at an angle to capture scrapes.
Photograph glass and lights. Take close-ups of the windscreen (especially the driver’s view area), any chips, headlights, tail lights, and indicator lenses. Even small cracks can be disputed later if they are not recorded.
Do not forget the roof and underside edges you can see. You do not need to crawl under the car, but do photograph visible scrapes beneath bumpers and any low-hanging trim, especially on SUVs. If you are choosing a larger vehicle, this is particularly relevant when arranging SUV hire in Orlando, because higher kerbs and parking stops can catch plastics.
Capture the interior condition. Photograph the seats, carpets, door cards, and the boot area. Look for stains, tears, burn marks, or deep scratches on plastics. Take a photo of any existing warning stickers, pet hair, or strong evidence of previous spills.
Take dashboard proof: mileage and fuel. Turn the ignition on and photograph the dashboard clearly showing the odometer (mileage) and the fuel gauge. If the car shows a “range” estimate instead of a fuel bar, photograph that too. If there are any warning lights, take a clear photo of those indicators illuminated.
2) Do a slow, systematic exterior check before you move
Photos are essential, but a visual check also helps you spot issues you might otherwise miss. Do a full circle around the car and look at panels from different angles, as shallow dents show up best in reflection.
Check tyres for obvious problems. Look for bulges, deep cuts, or severely uneven wear. Confirm all tyres appear similarly inflated. If you see a low tyre, ask for it to be addressed before leaving rather than relying on a tyre warning later.
Check number plates and stickers. Confirm the licence plate matches the agreement (details below) and look for any existing plate damage. If there is a toll transponder sticker or device, note its position and condition.
3) Verify fuel, mileage, and what “full” really means
Fuel and mileage disputes are some of the easiest to avoid if you check them upfront.
Fuel policy clarity. Confirm whether you are expected to return the car full, at the same level, or under a prepaid option. In practice, “full” on the gauge may sit a hair below the top line. If the gauge is not at the expected level for your policy, raise it immediately and photograph it.
Record the exact mileage. Compare the odometer photo to what is written on your paperwork. If the agreement shows a different mileage, request it is corrected before you drive away. This is especially important if you are collecting at Orlando airport for Disney-area travel, where you may head straight onto busy roads and not want to return to the desk.
Understand deposits and pre-authorisations. If paperwork mentions a fuel deposit, a security pre-authorisation, or a hold amount, keep a screenshot or photo of that figure. This is not a “car condition” item, but it is part of documenting what you agreed to on pickup day.
4) Make sure the paperwork matches the vehicle in front of you
Before leaving the lot, confirm that the car you have been given is the car listed on the agreement. This takes a minute and prevents headaches later if plates or vehicle classes get mixed up.
Match the licence plate. Compare the plate number on the agreement with the physical plate on the car. If it does not match, go back inside and have the agreement reissued.
Match the VIN if you can. The VIN is commonly visible through the windscreen at the driver’s side and also on a door jamb sticker. You do not need to memorise it, just confirm the last several characters match the contract. Photograph the VIN plate through the windscreen if it is readable.
Match the car class and promised features. If you selected an automatic, a specific size, or luggage capacity, confirm it is correct before you load up. If you arranged your car hire using a specific provider option, such as National car hire at Orlando MCO, verify the car meets the category you expected.
Confirm names and drivers. Ensure the correct lead driver is on the agreement and any additional drivers are listed if required. Mistakes here can affect coverage and permissions.
5) Quick functional tests you can do safely at the bay
A few short checks can reveal problems that are easier to solve before you exit the facility.
Lights and indicators. Turn on headlights, hazards, and indicators. Walk around to confirm they illuminate. If you are travelling with others, ask someone to step outside and confirm brake lights while you press the pedal.
Wipers and washer fluid. Do a quick squirt of washer fluid. In Florida, sudden rain is common, and poor wipers can be stressful on unfamiliar roads.
Air conditioning. Set A/C to cold and confirm it blows properly. This is a comfort issue, but also a safety one if windows fog during rain.
Parking brake and basic controls. Confirm the parking brake releases, mirrors adjust, seatbelts click, and the horn works. Pair your phone if you plan to use hands-free, but do it while stationary.
7) A final 30-second check before you exit the car park
Before you pull out, set up your driving position and route while still parked. Confirm your mirrors, seat, and steering wheel position. Enter your first destination into navigation and review the first turn, so you are not distracted at the exit barriers.
If you are still deciding which pickup option fits best, it can help to compare car hire at Orlando MCO details with other Orlando airport collection pages, so you arrive knowing what documents and checks you want to complete.
FAQ
Q: What are the most important photos to take before leaving in Orlando?
A: Take wide shots of all four sides, close-ups of each wheel, the windscreen, any visible damage, and a clear dashboard photo showing mileage and fuel.
Q: Should I photograph the VIN and licence plate for car hire?
A: Yes. A photo of the licence plate and a readable VIN (often at the windscreen) helps prove the paperwork matches the exact vehicle you collected.
Q: What if the fuel gauge is not exactly on “full” at pickup?
A: Photograph the gauge and report it before leaving. Ask for the fuel level to be corrected in writing or noted on the condition report.
Q: How do I handle small scratches or kerb rash I spot on the wheels?
A: Take close-ups from two angles, then have staff record the location on the check-out report. Keep a photo of the updated report with your images.
Q: Is it worth doing a quick control check even if I am in a hurry?
A: Yes. Test lights, wipers, and air con while stationary. It is quicker to change cars in the bay than to return after leaving the facility.


