


Quick Summary:
- Confirm whether you have a spare tyre, donut spare, or inflator kit.
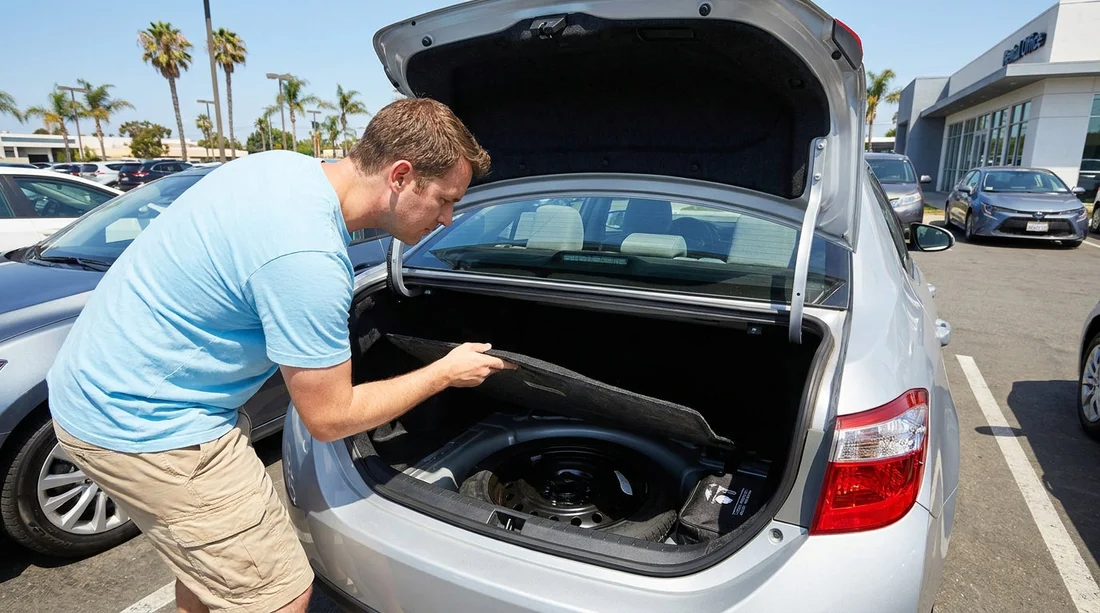
- Find the kit in the boot and learn how to access it.
- Check pressure, sealant expiry date, and essential tools before leaving.
- Photograph items and note any problems on the condition report.
Picking up a car hire in California often feels quick: keys, paperwork, and out you go. But breakdown support and roadside assistance do not replace a basic check of what happens if you lose a tyre on I-5, Highway 1, or a remote desert road. Many modern fleets no longer include a full-size spare, and some include only a tyre inflator kit with sealant. That is fine, as long as you know what you have, where it is, and whether it is usable.
This counter-to-car checklist focuses on three things you can verify in minutes: where the spare tyre or inflator kit lives, what should be in the boot, and what needs to be written on the condition report before you drive off.
1) Confirm which puncture solution the vehicle actually has
At the counter (or kiosk), ask a simple, specific question: does this vehicle have a spare tyre, a space-saver donut, run-flat tyres, or only an inflator kit? Do not assume based on vehicle size. Some SUVs still have no spare, and some saloons have a donut spare with a speed restriction.
Also ask whether the kit is supplied by the rental company or is missing by design for that model. If the agent says it is “standard”, ask them to confirm it is present in the vehicle you are being assigned. If you are collecting from a busy airport location, such as Los Angeles LAX, vehicles can turn around quickly and items do go missing between rentals.
Finally, check whether roadside assistance is included, and whether tyre damage or call-outs are chargeable under your agreement. This does not change the physical check you should do, but it helps you decide whether you would use the kit yourself or call for help.
2) Find the kit in the boot before loading luggage
Do this before you load suitcases, pushchairs, or shopping, because once the boot is full you are unlikely to unpack it on the forecourt.
Common storage locations include under the boot floor panel, behind a side trim hatch, or in a foam organiser around the spare wheel well. Some vehicles have the wheel and jack accessed from inside the cabin, via a folding rear seat flap. If you cannot immediately identify where the kit is, ask a staff member to show you. Knowing the release method matters, as some boot floors are secured with clips, a strap, or a twist fastener that can be confusing in poor light.
If you are picking up in Northern California, such as Sacramento SMF or San Francisco SFO, you might head straight to bridges, hills, and busy city streets. A two-minute check now avoids trying to figure it out later on a shoulder with traffic nearby.
3) If there is a spare tyre, verify these items
A spare tyre setup is only useful if all the supporting tools are present and the tyre holds air.
Spare tyre type and condition: Full-size spares are ideal, but many cars carry a donut spare. Donuts are narrower, may have a maximum speed limit marked on the sidewall, and are intended for short distances. Check the tread looks usable and the sidewall has no obvious cracking.
Tyre pressure: A spare is often low because it is ignored. Look for a pressure label on the spare or on the driver’s door jamb. If there is a gauge available at the rental exit lane or service area, check it. If you cannot check pressure on-site, at least note the spare’s condition and request a swap if it looks flat.
Jack and wheel brace: Confirm the jack is present, the handle or crank is included, and the wheel brace fits the lug nuts. Some kits also include a locking wheel nut key, without which you cannot remove the wheel.
Wheel well access and lifting points: You are not doing the change in the lot, but you should at least glance at the jack points marked on the sill. If you do not know them, take a quick photo of the diagram in the manual or on a sticker.
4) If there is an inflator kit, check it is complete and in date
Inflator kits typically contain a 12V compressor and a sealant canister. They can work well for small tread punctures, but they do not help with sidewall cuts or a tyre that has come off the rim.
Compressor present and undamaged: Check the power plug, cable, and hose are intact, and the on/off switch is not broken. Make sure the hose connector is not cracked.
Sealant canister is unopened and in date: Sealant has an expiry date. If it is expired or the seal is broken, treat the kit as unusable and note it. If you are collecting near the coast, such as San Diego SAN, you may drive long stretches where you would rather not discover the sealant is expired at night.
Instructions are included: Some kits have a simple laminated card. Others rely on the owner’s manual. If instructions are missing, you can still use many compressors for air-only, but using sealant incorrectly can create a bigger problem.
5) Match what you see to the condition report, then document it
Your goal is not to be difficult, it is to make sure you are not held responsible for missing equipment later, and to avoid a nasty surprise when you actually need the kit. Before leaving the pick-up area:
Photograph the spare or inflator kit: Take clear photos of the spare tyre (including the sidewall markings), the tool layout, and the sealant expiry date if present.
Note missing or damaged items on the report: If the condition report is digital, ask the agent to add notes such as “no jack present”, “sealant expired”, or “spare appears flat”. If it is a paper form, write legibly and keep a copy. Make sure the agent acknowledges it.
Ask for a swap if the kit is unusable: A flat spare or expired sealant is not a minor detail. It is reasonable to request another vehicle or for the kit to be replaced before you leave.
If you are collecting a larger vehicle from a location such as San Jose SJC, confirm the kit is accessible even with a loaded boot.
Lastly, remember that using sealant can make the tyre harder to repair and may lead to charges depending on the rental terms. That is another reason to document the kit condition at pick-up, so you can show what you were provided.
FAQ
Do rental cars in California always come with a spare tyre? No. Many fleets provide a tyre inflator kit instead of a spare, and some models use run-flat tyres. Confirm what your specific vehicle has at pick-up.
What should I do if the spare tyre is flat or the sealant is expired? Do not leave the lot without noting it. Ask staff to replace the kit, inflate the spare, or assign another vehicle, and ensure it is recorded on the condition report.
Can I use the inflator compressor without the sealant? Often yes, many kits allow air-only inflation, which is useful for slow leaks. However, if the tyre has a cut or major puncture, inflation may not hold and you should seek assistance.
Is it worth photographing the spare tyre and tools? Yes. Photos showing the kit contents and sealant expiry date provide evidence of what you were given, and help resolve disputes about missing items later.
Where is the spare tyre or inflator kit usually stored? Commonly under the boot floor, behind a side panel, or in a foam organiser in the spare wheel well. Some SUVs store the spare underneath the vehicle with a lowering tool.





























































































