


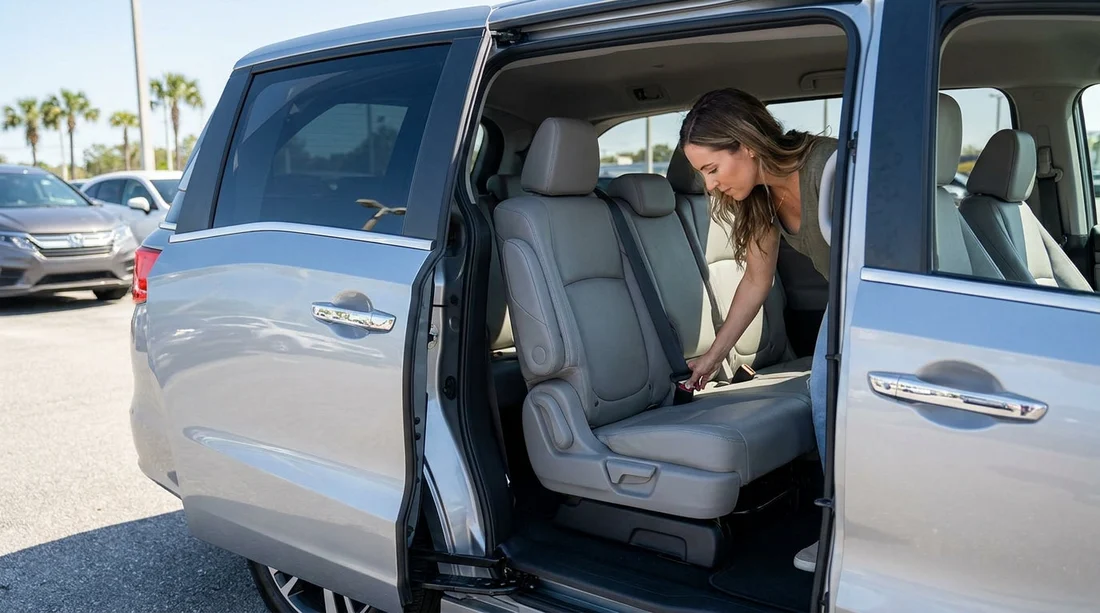
Quick Summary:
- Count seat positions and confirm each has a matching seatbelt buckle.
- Test every belt for clicks, retraction, locking, and visible wear.
- Check child-seat anchors and confirm belt paths work for your seats.
- Photograph any faults and request a vehicle swap before leaving.
Picking up car hire in Orlando can be fast-paced, especially after a long flight and with luggage, children, or a big group. Yet the simplest safety check is also the easiest to overlook, confirming the car actually has enough usable seats and seatbelts for everyone travelling. A model name or vehicle class on your confirmation does not guarantee the exact interior layout of the specific car you are handed, so it pays to do a short counter-and-car-park checklist before you drive off.
This guide walks you through what to verify at the desk and what to check in the car park, focusing on seat count, belt condition, and child-seat compatibility. If you are collecting near the terminals, it also helps to know which vehicle sizes are usually available around Orlando International. You can compare typical options on Hola Car Rentals pages such as Orlando MCO car rental and the UK-focussed Orlando MCO car hire listings.
At the counter: confirm seating on paper before seeing the car
Start with the basics while you still have an agent in front of you. Ask the agent to confirm how many seat positions and seatbelts the assigned vehicle has, not just how many passengers it is marketed for. Some vehicles technically seat seven but have tighter third-row positions that are unsuitable for taller adults or for fitting multiple child seats.
1) “How many seatbelts does this exact vehicle have?” You are looking for a specific number that matches your party size. If you need six travellers seated, you need six usable belts, not “seats for six”.
2) “Is the third row present and usable today?” In some people-carriers and SUVs, a rear row may be folded, missing a headrest, or blocked by equipment. You want confirmation it is installed and available.
3) “Can you note any seating requirement on the agreement?” If your group size is large, having the requirement reflected in notes can make a swap easier if the car park vehicle is unsuitable.
If you expect to need a larger vehicle class, it helps to understand what tends to offer full rows and multiple anchor points. You can browse typical group-friendly categories such as van rental near Disney and MCO or compare larger options like SUV hire in Orlando MCO.
In the car park: a five-minute seats-and-belts walk-through
Do the physical check before loading everyone in and before leaving the pick-up area. Aim for a calm, methodical loop of the cabin. If you are travelling as a group, ask one adult to watch the luggage trolley while you inspect the car.
Step 1: count actual seating positions, not just headrests
Open all doors, then count the seating positions where a person can legally sit. A position should have a seat base, a backrest, and a seatbelt.
Headrest count can mislead. Some rear centre positions have no headrest but are still legal seats, others have a headrest but a compromised belt setup.
Fold-out seats may be hidden. Third rows often fold flat into the boot floor. Ensure the seat locks into place and the backrest latches firmly.
Middle seat width matters. A rear bench might have three belts, but the middle is narrow. If you need three adults across, sit one adult down to test space before committing.
Step 2: match every seat to a complete belt system
For each seat position, confirm there is a complete belt, meaning a belt tongue that inserts into a buckle, a buckle receiver that is accessible, and a shoulder section for three-point belts where expected.
Then do a quick functional test on every belt, including the third row. Insert the tongue into the buckle and confirm it clicks positively, press the red button and ensure it releases cleanly, and pull the belt out fully and let it retract smoothly without sticking. Give the belt a sharp tug to check it locks briefly.
Also check belt condition closely. Look for fraying edges, cuts, melted sections, heavy staining, or twisted webbing that will not lie flat. A twisted belt can reduce effectiveness and can interfere with child-seat routing.
Step 3: child-seat compatibility, anchors, and space
If you are fitting a child seat, your goal is to ensure you can install it securely in an appropriate seating position using either the lower anchors and tether or the vehicle belt path, depending on the seat type. Orlando family trips often involve multiple child seats, so plan positions before you install.
Find ISOFIX or LATCH anchors. In the US, lower anchors and top tethers are often labelled. Feel between the seat back and cushion for the metal bars if labels are missing.
Locate top tether points. For forward-facing seats, check for tether anchors behind the seat or in the boot area, depending on vehicle design. Make sure the tether route is clear and the anchor hardware is intact.
Check belt locking method. Many vehicle belts lock by pulling the shoulder belt all the way out and letting it ratchet back in. Confirm you can engage this mode when installing with the belt instead of lower anchors.
Do a door and buckle clearance check. Ensure the child seat does not prevent proper door closure, and that the buckle is not bent under the seat base.
What to do if something is wrong
If you find a missing belt, a buckle that will not latch, heavy belt damage, a seat that will not lock, or missing child-seat anchors you expected, do not leave the pick-up area. Take clear photos of the issue and the vehicle plate or stock number, then return to the counter or the lot attendant to request a different vehicle.
When you explain the problem, be specific: “Rear right buckle does not click”, “third row left shoulder belt will not retract”, or “no tether anchors visible for forward-facing seat”. This keeps the discussion factual and helps staff assign a suitable replacement quickly.
If your trip plans involve driving between theme parks and different parts of the city, you want seating sorted from the start. Hola Car Rentals also has supplier-specific pages that can help you compare what you might encounter at the airport, such as Alamo at Orlando MCO and Payless car hire near Disney and MCO.
One last check before you drive off
Once everyone is seated, do a final belt check with passengers. Confirm each person can buckle up without sharing a buckle or using an extender that is not provided with the car. Make sure shoulder belts are not routed under arms or behind backs, and ensure the boot is closed without luggage forcing a third-row seatback out of position.
These few minutes in the car park are a practical way to confirm your Orlando car hire is truly fit for your group, including safe, usable seatbelts and workable child-seat positions.
FAQ
Q: How many seatbelts should a seven-seater rental have?
A: It should have seven usable seatbelts, one for each seating position. If any belt is missing, damaged, or a buckle will not latch, treat it as not usable and request a different vehicle.
Q: What seatbelt problems are serious enough to request a swap?
A: Any belt that is frayed, cut, heavily worn, will not retract, will not lock under a sharp tug, or any buckle that does not click and release reliably.
Q: Can I fit three child seats across the back in a typical Orlando rental?
A: It depends on the vehicle’s rear bench width and buckle spacing. Even with three belts, the centre position may be too narrow.
Q: How do I check for LATCH or tether anchors quickly?
A: Look for small labels showing anchor positions, then feel between the seat cushion and backrest for the metal bars. For forward-facing seats, locate the top tether anchor behind the seat or in the boot area and confirm the attachment point is present and accessible.
Q: Should I do these checks before or after loading luggage?
A: Before. Open access to the third row and belt anchors is easier when the boot is empty, and if you need a vehicle swap you will avoid unloading everything again.































































































