


Quick Summary:
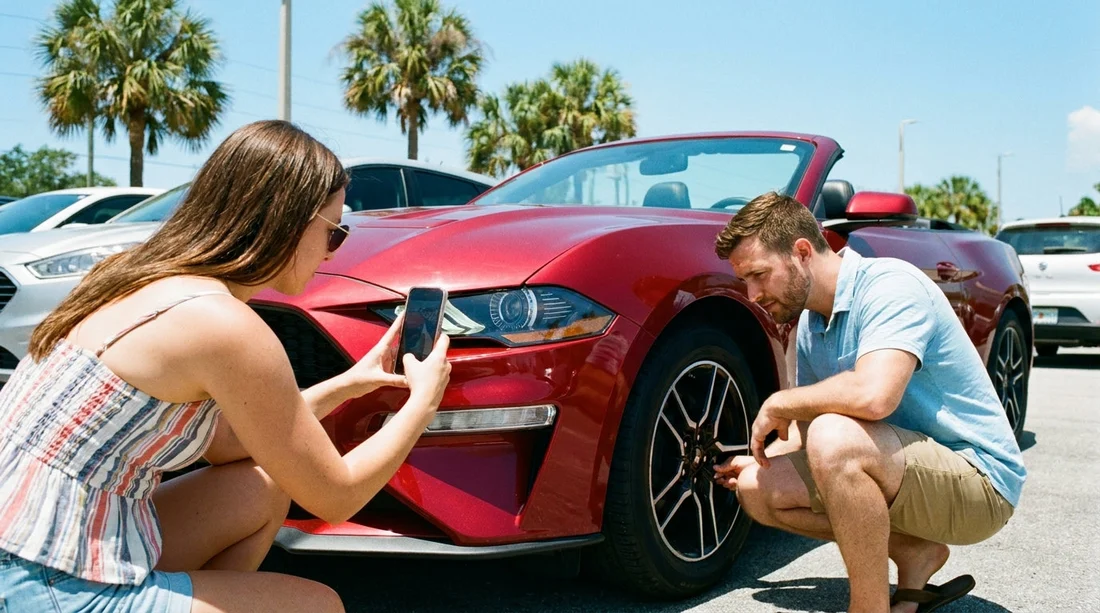
- Photograph panels, wheels, windscreen, roof, and interior before moving off.
- Match existing damage to the inspection sheet and add missing notes.
- Confirm fuel, odometer mileage, and warning lights using clear photos.
- Review the agreement, insurance, toll policy, and return rules carefully.
Picking up a car hire in Florida is usually fast, but it is also the moment when small oversights become expensive disputes later. A five to ten minute check, done calmly before you exit the car park, helps you avoid being blamed for pre-existing damage, misunderstandings about fuel, or confusion around tolls and extra charges. Florida’s sun can hide light scratches, sudden rain can make photos blurry, and busy airport locations can make you feel rushed. The aim is simple: create a clear record of the car’s condition and the agreement you accepted.
This checklist focuses on what to photograph and what to verify at the counter or curbside, so you can drive away confident. For location-specific pick-up planning, you can review Hola Car Rentals pages such as car rental Fort Lauderdale FLL or car rental Miami Beach MBC before you travel.
Before you start: set up your phone and timing
Do your documentation before you join the exit queue. Park somewhere safe, switch on hazard lights if needed, and take photos in good light. If it is dark in a garage, use your phone’s night mode rather than flash, because flash can wash out dents and scuffs.
Helpful settings: enable time and location metadata (most phones do this by default), and record short videos when light is uneven. A video walkaround can show continuity, while close-up still images capture detail.
Exterior photos: the complete walkaround you should capture
Start with wide shots, then move to detail. The goal is to show the entire vehicle, then any marks, and finally the number plate and identifiers.
1) Four-corner wide shots: Stand a few metres back and photograph front-left, front-right, rear-left, rear-right. These prove overall condition and show alignment issues or larger dents.
2) Each side panel in sequence: Take a photo straight-on of the driver side, then the passenger side. Add additional shots of doors and rocker panels, where car park scrapes are common.
3) Bumpers and lower edges: Photograph the front bumper lip and rear bumper corners. These are the most frequently damaged parts and often overlooked when you are rushing.
4) Wheels and tyres: Take a clear photo of each wheel, including rims, and a tyre tread shot if visible. Kerb rash can be disputed later, and some suppliers charge for rim damage even when minor.
5) Windscreen, windows, mirrors, and lights: Photograph the windscreen from an angle that shows chips, plus each headlight and tail light. In Florida, sand and highway debris can cause tiny chips that are easy to miss until sunlight hits.
6) Roof and bonnet: If you can safely do it, photograph the roof and bonnet. Hail marks are rare but not impossible, and roof scratches can occur from low garage clearance or loading.
7) Number plate and vehicle identifiers: Photograph the front and rear number plates. If a barcode sticker or fleet number is visible on the windscreen, capture it too. This helps if there is confusion about which car was assigned.
If you are comparing car categories, such as a larger family option, Hola Car Rentals pages like SUV rental Tampa TPA can help you anticipate size and parking considerations in advance.
Interior photos: what to document inside the car
Interior issues can also lead to charges, especially stains, tears, odours, or missing equipment. Take quick, well-framed shots before placing luggage inside.
Seats and upholstery: Photograph front seats, rear bench, and any visible stains or rips. If it is leather, capture scuffs at the bolsters.
Dashboard and centre console: Take a wide photo of the dash, then a close-up of the infotainment screen and climate controls. Scratched screens and missing knobs can be disputed if undocumented.
Car mats and footwells: Photograph the driver footwell and mats. If mats are missing, note it immediately, because it can affect cleanliness claims at return.
Boot (trunk) and cargo cover: Photograph the boot area, spare wheel cover if present, and any stains. If the car has a removable cargo cover and it is missing, flag it.
Keys and accessories: Photograph the key fob(s). If you received only one key, document that, because replacement fobs can be costly.
Damage notation: match photos to the inspection report
Many suppliers provide an inspection sheet, app, or digital damage map. Do not assume it is complete. Compare the car to the marked diagram line-by-line.
Circle and confirm: If you find any scratch, dent, chip, or rim mark not already recorded, ask staff to add it before you leave. If the process is app-based, upload your photos and make sure the submission confirms.
Be specific with location: For example, “rear bumper, passenger-side corner, 4 cm scuff” is stronger than “scratch on bumper”. Then photograph the close-up and a wider shot showing which panel it is on.
Check for cracks, not just scratches: Windscreen chips can spread quickly with heat changes and motorway driving. If you see a chip, get it recorded and photographed clearly.
Fuel level: verify the policy and capture proof
Fuel misunderstandings are one of the most common issues with car hire. First, confirm which policy applies to your agreement, then document the actual fuel level.
Photograph the fuel gauge: Take a clear photo of the gauge while the car is stationary at pick-up. If it is not full and your paperwork states full-to-full, ask for correction or a note.
Understand pre-purchase options: Some agreements include pre-paid fuel. If so, verify whether any refund applies for unused fuel, and keep the paperwork that confirms what you paid for.
Mileage, time, and warning lights: capture the dashboard status
Before you drive, start the car and keep it in park.
Odometer: Photograph the mileage reading. This is useful if you have mileage limits, or if the agreement uses mileage to calculate rental periods or maintenance swaps.
Dashboard warning lights: With the ignition on, photograph the dash after the initial light test. If any warning stays on, such as tyre pressure, engine, or airbag, report it immediately. Even if it is minor, it should be documented as pre-existing.
Paperwork checks: what to read before you roll out
Paperwork sounds dull, but it is where most surprise charges hide. Take photos or screenshots of the key pages in your rental agreement.
Driver and vehicle details: Confirm your name, licence details, and the correct vehicle class. If you were promised an automatic, ensure the contract reflects that category.
Insurance and excess: Verify what is included and what is optional. Ensure you understand the excess amount, and whether tyres, glass, and underbody are covered. Only accept options you recognise and agree to.
Toll policy in Florida: Florida has extensive toll roads. Confirm whether your car hire includes a toll pass, uses a pay-by-plate system, or charges an admin fee per toll. Keep the document that explains how tolls are billed.
Return rules: Note the return location, opening hours, fuel requirement, and any grace period. For brand and local process expectations, you can compare pages such as Avis car rental Miami Beach MBC and Alamo car rental Miami Beach MBC.
At drop-off, repeat a smaller version of the same process: fuel gauge, mileage, and a quick exterior walkaround. This makes your car hire in Florida feel predictable rather than uncertain.
FAQ
Q: How many photos should I take at pick-up? A: Take enough to cover every side and key detail, typically 20 to 40 photos plus one walkaround video. Prioritise bumpers, wheels, windscreen, and any marked damage.
Q: What if the inspection report is digital and staff are busy? A: Upload your photos in the app if possible, and ask for confirmation that the new damage notes were saved. If no one can update it immediately, take a photo of the damage and the screen showing your report status.
Q: Should I photograph the fuel gauge even on a full-to-full policy? A: Yes. A clear fuel-gauge photo at pick-up and return is the simplest way to prevent fuel disputes, especially if the gauge is slightly under full.
Q: What paperwork pages are most important to keep? A: Keep the page showing vehicle details, fuel policy, insurance and excess, toll policy, and the receipt or summary with your deposit and charges.
Q: What should I do if I notice a warning light after leaving the lot? A: Safely pull over, photograph the dashboard, and contact the rental provider promptly to create a time-stamped record. Ask what they want you to do next, and keep notes of the conversation.






























































































