


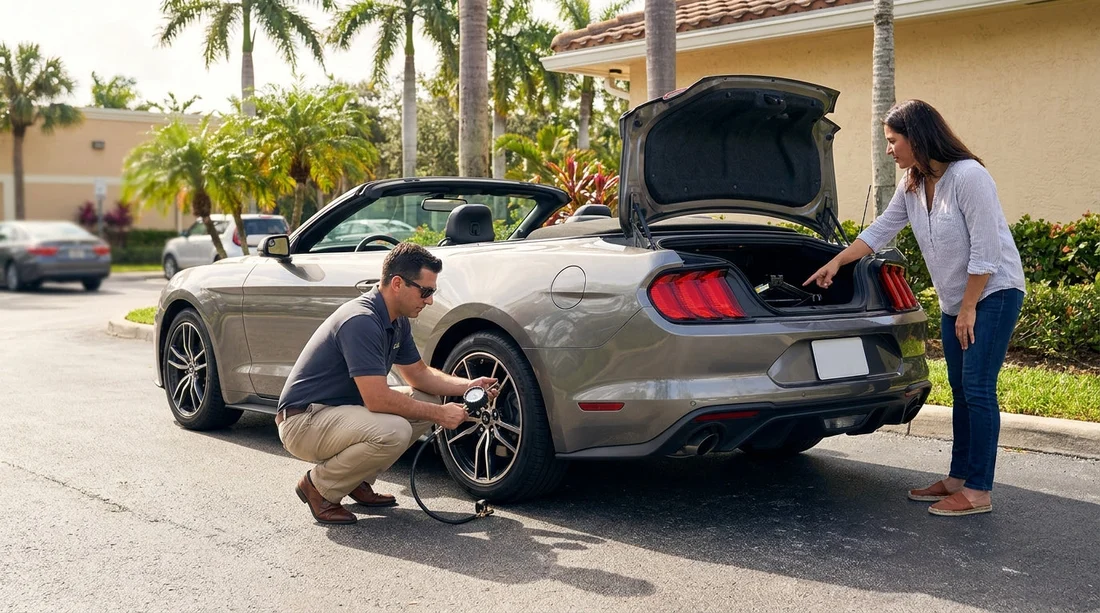
Quick Summary:
- Photograph each tyre sidewall and tread, noting any cuts or bulges.
- Check the TPMS light and confirm pressures match the door sticker.
- Confirm a spare or mobility kit, plus jack and wheel brace.
- Test the wheel tool fit and locate the correct jack points.
In Miami, it is easy to rush the handover when the sun is out and your plans are waiting. But a two minute tyre and jack check at the counter and at the car can save you hours later, especially if you hit a pothole, pick up a nail, or discover a missing tool kit when you need it most. This practical checklist focuses on warning signs you can spot early, before you drive off in a car hire vehicle.
If you are collecting near the city centre, you may want to allow a little extra time for the walkaround. Pickups can be busy at Downtown Miami and the nearby streets make it harder to find a quiet spot to inspect tyres properly. The same applies if you are starting from the financial district around Brickell, where kerbs and tight turns can hide sidewall scuffs.
1) Start with the paperwork and dashboard warnings
Before you even step outside, ask whether the vehicle has a full size spare, a space saver spare, or a tyre mobility kit. Many modern cars no longer carry a spare wheel, so you do not want to assume. Confirm the policy for punctures and roadside assistance, and make sure you know who to call if you cannot safely drive.
Then turn the ignition on and look for tyre related warning lights. The most common is the TPMS light (tyre pressure monitoring system). It should illuminate briefly, then go out. If it stays on, flashes, or shows a message like “Check tyre pressure”, do not ignore it. Ask staff to verify pressures with a gauge and reset the system only after the underlying issue is fixed. A reset without proper inflation is a red flag.
2) Do a full tyre walkaround, front to back
Stand where you can see each tyre’s full sidewall and tread. Do not rely on a quick glance. Walk around slowly and use your phone torch if lighting is poor.
Sidewall condition: Look for cuts, bulges, cracks, or bubbles. A bulge can indicate internal cord damage from an impact, such as a pothole. If you see a bulge, request a different vehicle.
Tread depth and wear: You do not need a gauge to spot uneven wear. If one shoulder is much more worn than the centre, it could indicate alignment issues. If the tyre looks bald in any area, it is unsafe and should be changed.
Embedded objects: Nails, screws, and small stones can sit in the grooves. If you see something metallic, do not pull it out. Ask for assistance, because removing it can cause a rapid leak.
3) Check tyre pressures properly, not by kicking the tyres
A tyre can look fine and still be underinflated. Underinflation increases heat build up and can reduce stability, especially at motorway speeds. Ask if the branch can check pressures for you. If you have access to a gauge, compare to the vehicle placard, usually on the driver’s door jamb. Do not use the number on the tyre sidewall, that is a maximum rating, not the recommended pressure.
If you are collecting from a beach area location like Miami Beach, pay extra attention to pressures. Stop and start driving, hot tarmac, and frequent kerb contact can reveal a slow leak more quickly than steady highway miles.
4) Inspect the spare wheel or mobility kit, and confirm it is usable
Open the boot and locate the spare wheel well or the kit storage area. What you are checking is presence, condition, and completeness.
If there is a spare wheel: Lift the cover and confirm the wheel is there, not missing. Check its tyre pressure if possible, spares are often neglected. If it is a space saver spare, note any speed and distance limitations printed on it.
If there is a tyre mobility kit: Confirm it includes sealant and a compressor, and check the sealant expiry date. Expired sealant may not work.
Look for the wheel lock key: Some vehicles have locking wheel nuts. If so, the matching key must be in the car. Without it, you cannot remove the wheel, even with a jack and brace.
5) Verify the jack, wheel brace, and safe lifting points
Many drivers only discover a missing jack or incorrect tool when they are stranded. Check before you leave the car park.
Find the jack and tools: Locate the jack, wheel brace (lug wrench), towing eye, and any extension bars. Ensure they are not loose, bent, or heavily corroded.
Confirm the correct jack points: Jack points are usually reinforced areas under the sills, sometimes marked by notches. Check the owner’s guide if it is in the glovebox, or look for markings. Incorrect jacking can damage bodywork or cause the car to slip.
If you are hiring a larger vehicle, such as a people carrier, tool checks matter even more because wheels are heavier and access can be tighter. If that is your plan, see options like minivan rental in Coral Gables and ask specifically what puncture equipment is included with that class of vehicle.
6) Look for subtle handling clues before exiting the lot
Once you have done the stationary checks, do a very short, low speed test within the pickup area.
Steering feel: The car should not pull strongly to one side. A pull can mean low pressure on one corner, alignment issues, or a tyre problem.
Vibration: If you feel a steady vibration through the wheel or seat at low speeds, it could be a damaged tyre, a bent rim, or a wheel balance issue. Report it immediately.
Branch staff are used to walkbacks for genuine issues, and it is far easier to swap vehicles on the spot than to troubleshoot later on a busy Miami roadway. If you are collecting from a branded desk, such as Alamo at Miami, ask them to note any tyre or wheel observations on your agreement before you leave.
7) Document everything clearly
Take photos of each tyre from two angles, plus close ups of any scuffs, cracks, or wheel marks. Also photograph the boot area showing the spare or kit. If the dashboard shows a TPMS message, photograph that too.
Finally, if anything feels uncertain, such as a persistent pressure light or a missing lock key, do not accept “it should be fine”. Tyres are the only contact point with the road, and the right kit is what turns a puncture into a manageable delay rather than a serious problem.
FAQ
Q: What should I do if the tyre pressure warning light is on at pickup?
A: Ask for pressures to be checked with a gauge and corrected to the door sticker values, then have the system reset. If the light returns, request another vehicle.
Q: Do all car hire vehicles in Miami come with a spare tyre?
A: No. Many cars provide a mobility kit instead of a spare. Confirm what your specific vehicle has, and check the kit is complete and in date.
Q: How can I spot unsafe tyre damage quickly?
A: Look for sidewall bulges, cuts, exposed cords, or very uneven wear. Any bulge or deep sidewall cut should be treated as unsafe.
Q: What tools should be in the boot for a puncture?
A: A jack, wheel brace, and towing eye are common, plus a spare wheel or a compressor and sealant kit. If there are locking wheel nuts, the lock key must be present.
Q: Is it worth photographing tyres and the spare kit before leaving?
A: Yes. Photos help confirm condition at pickup, support any notes added to the agreement, and make it easier to explain issues if you need assistance later.




























































































