


Quick Summary:
- Photograph the full instrument cluster showing fuel gauge, odometer, and time display.
- Capture the rental agreement fields for mileage, fuel policy, and vehicle identifiers.
- Take wide exterior shots, then close-ups of existing scratches, wheels, and mirrors.
- Check every image is readable before leaving the bay or car park.
When you collect a rental car for car hire in Miami, the most useful photos are the ones that clearly connect three things, the car you received, the numbers on the dashboard, and the terms on your paperwork. Disputes usually happen because one of those links is missing. A close-up of a fuel needle without context can be challenged. An odometer photo without the vehicle identification can be questioned. Your aim is to create a simple, time-stamped story of pick-up condition, fuel level, mileage and any marks already present.
Take your photos before you leave the bay or car park, ideally with location services enabled on your phone. If it is dark in a garage, use your phone’s flash carefully, and take a second non-flash photo to avoid glare on the cluster. If staff are present, keep it polite and factual, you are simply documenting the handover.
1) The essential dashboard photos that prove fuel and mileage
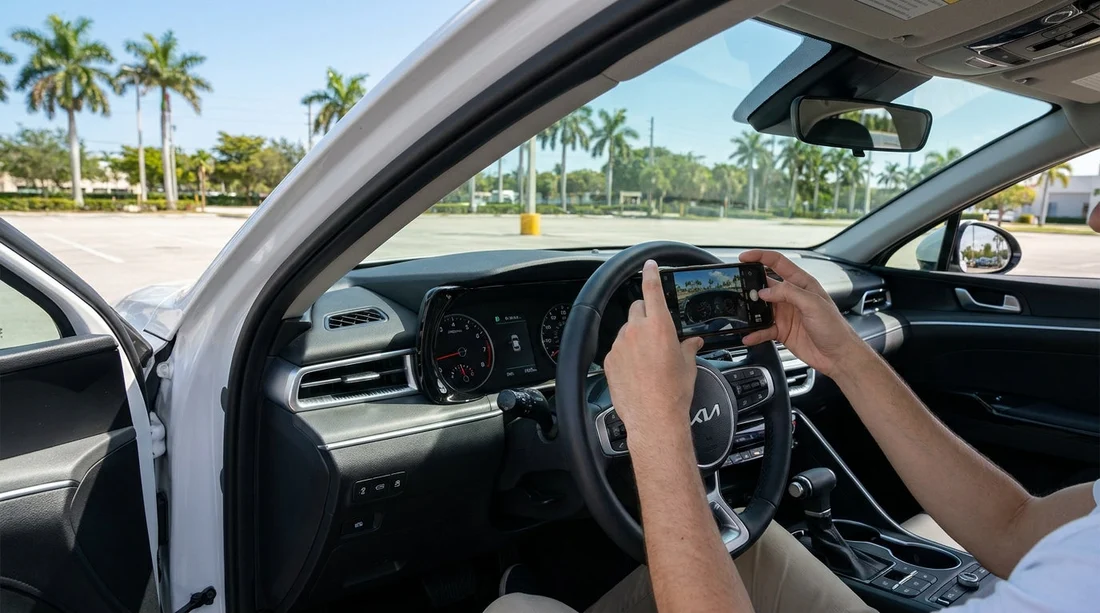
Photo A, full instrument cluster from the driver’s seat. Frame the entire cluster, not just the needle. The shot should include the fuel gauge, the odometer reading, and any digital time display. If your phone allows it, tap to focus on the odometer so the numbers are crisp. This is the single most important image for fuel and mileage evidence.
Photo B, ignition on with warning lights settled. For many cars, the fuel gauge changes slightly once the ignition is fully on. Take a second image once the car has finished its initial warning-light cycle. If the car shows “range” or “miles to empty”, capture that too, but treat it as supporting evidence rather than the primary proof.
Photo C, trip computer and units. Miami rentals may show miles, not kilometres. Photograph the settings screen or trip screen that confirms the unit (mi or km). This prevents confusion if paperwork uses a different unit format, or if someone later claims a mismatch in mileage.
If you are picking up near the airport area, this process is identical whether you use a local branch or a partner brand. For context on locations and typical pick-up environments, see Avis car hire Miami.
2) Paperwork shots that connect the dashboard to the contract
Your photos should also prove what was agreed at the counter. Many disagreements come from a fuel policy misunderstanding, such as “full to full” versus “prepaid”. Photograph the paperwork while you are still on site, so you can request corrections immediately if something is wrong.
Photo E, the rental agreement summary page. Capture the section that shows pick-up date and time, vehicle group or model, registration or plate number, and the recorded starting mileage. If the agreement includes a “fuel out” field, photograph it clearly. If the document is long, take multiple photos that overlap, so it is readable.
Photo F, fuel policy wording. Find the exact line describing the fuel policy and photograph it. Do not rely on verbal explanations. If it states a prepaid option, ensure you understand whether you must return empty or return with any level. Your fuel gauge photo becomes meaningful only when paired with this policy wording.
Photo G, damage diagram and notes. Most agreements include a vehicle outline where staff mark existing damage. Photograph the diagram and any written notes. If you later add your own damage report, you will be able to show what was and was not recorded at pick-up.
Photo H, the vehicle identification reference. If the agreement includes VIN, plate, or a stock number, capture that line. It links your dashboard photos to the specific vehicle, which matters if you collect in a busy lot with several similar cars.
If you are collecting around Doral, where many depots handle high volumes, paperwork clarity is especially important. Location detail is available at car hire Doral and Enterprise car hire Doral.
3) Exterior photos that prove condition, not just fuel and mileage
Even though your main goal is fuel and mileage, condition photos protect you from being held responsible for pre-existing damage, which is a common stress point at return. Take wide shots first, then detailed ones. Wide shots establish orientation and context, detailed shots prove the mark.
Photo I, four corner wide shots. Stand a few metres away and photograph front-left, front-right, rear-left, rear-right. Make sure the plate is visible in at least one image, and that the photos show the whole side panels. These “baseline” images are often more persuasive than close-ups alone.
Photo J, close-ups of each wheel and tyre. Wheels are frequently scuffed. Photograph each wheel straight on, then at a slight angle to show the rim edge. Include the tyre sidewall so any existing cuts or bulges are documented.
Photo K, bumpers, bonnet, roofline, and mirrors. Take close-ups of front and rear bumpers, then a shot along each side reflecting light, which helps reveal dents. Mirrors and windscreen chips should be captured clearly. If you notice a chip, place your finger near it in one photo for scale, but also take a second photo without your finger to keep it unobstructed.
If you are starting your trip from the city centre, dense parking can make lighting and angles harder. A calmer approach is to take your wide shots first, then move closer for details. See car rental Brickell for a typical central Miami pick-up area overview.
4) A simple, repeatable pick-up workflow in Miami
To keep it practical, follow the same order every time you collect for car hire. Start with paperwork, then dashboard, then exterior. That order ensures you do not forget the numbers that can change, such as mileage if the car is moved, or fuel gauge settling after ignition.
Step 1, paperwork first. Photograph the agreement summary, fuel policy, starting mileage, and damage diagram before you walk away.
Step 2, dashboard second. Ignition on, take the full cluster, then the settled reading. Confirm units.
Step 3, exterior third. Four corners, wheels, then close-ups of any marks.
After you finish, scroll through the gallery and check readability. If any image is blurry, retake it immediately. In Miami heat or humidity, lenses can fog when moving from air conditioning to outdoors, so give the camera a moment and retake if needed.
5) What to do if the fuel or mileage on paper does not match
If the contract says “full” but the gauge is clearly below full, photograph both and raise it right away. Ask for the paperwork to be corrected, or for a written note added to the agreement. If the starting mileage on the agreement differs from your odometer photo, do the same. The key is to create a matching set, contract field plus photo proof, while you are still at the collection point.
If you are collecting at a neighbouring airport area and driving into Miami, it is still worth doing the full photo set before you join traffic. See car rental airport Fort Lauderdale for a common nearby starting point where quick, clear documentation helps.
FAQ
Which single photo is best to prove fuel level at pick-up? A full instrument cluster photo with the fuel gauge and odometer visible, taken with ignition on, is the strongest evidence.
Do I need a photo of the fuel receipt at pick-up? Not usually. What matters most is the fuel policy on your agreement and your dashboard fuel gauge photo taken at collection.
How do I prove starting mileage if the agreement only shows a vehicle group? Photograph the agreement line that identifies the specific car, such as plate or stock number, then photograph the odometer in the same pick-up session.
Should I take a video as well as photos? Yes, a slow walkaround video can support your photos, especially for showing panel condition, but keep clear still shots of the dashboard and paperwork.
What if it is too dark to read the odometer clearly? Take one photo with flash off to avoid glare, one with flash on if needed, and retake until the numbers are sharp before leaving.

























































































