Quick Summary:
- Photograph every exterior panel corner-to-corner, including bumpers and sills.
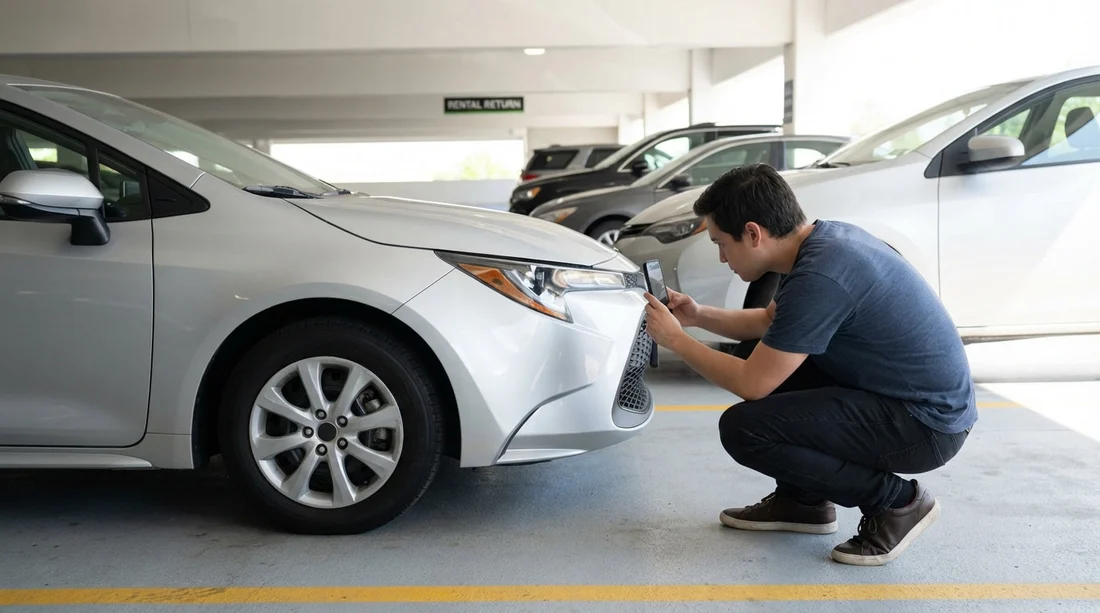
- Take close-ups of each wheel, tyre sidewall, and alloy scuffs.
- Capture windscreen, windows, mirrors, and lights, showing any chips.
- Snap dashboard showing fuel level, mileage, warning lights, and time stamp.
Collecting the right photos before you drive away is one of the simplest ways to protect yourself when using car hire in Pennsylvania. The goal is not to create an artistic gallery, it is to create evidence that matches the condition report you are asked to sign or approve. If a mark is already there, you want it documented clearly, from a sensible angle, in good light, and connected to the vehicle’s identity and current mileage.
This checklist focuses on what to photograph, how to photograph it, and how to make sure your images line up with the report. Whether you pick up at an airport or a city location, the routine is the same. If you are collecting near the terminals, the location pages for car hire at Philadelphia Airport (PHL) can help you plan where you will be collecting and returning. If you are comparing options across providers, you might also review car hire in Philadelphia to understand typical pick-up flows.
Before you start: set up your photos so they are usable
A handful of clear, well framed photos beat dozens of blurry ones. Take photos outside the vehicle first, then inside, then the dashboard. If it is dark or you are in a covered garage, switch on your phone’s flash for close-ups and use steady framing. Aim for a mixture of wide shots (context) and close-ups (detail).
Make sure at least one photo includes the number plate, and if accessible, photograph the VIN plate (often visible through the windscreen or on the driver door jamb). This helps tie your images to the exact car, which matters if you are in a busy lot with multiple similar vehicles.
Finally, open the condition report and compare as you go. If the report is digital, scroll to the damage diagram and the notes. If the report is paper, keep it in your hand and tick off areas as you photograph them. Your objective is to leave with a set of images that correspond to each section of the report.
Exterior panels: what to photograph and how
Most disputes relate to exterior scuffs, dents, scratches, and paint transfer, especially on corners and low areas. Photograph the car in a loop, starting at the front left and moving around clockwise, so you do not miss anything.
Wide shots for context: Take four wide photos, one from each corner, showing the whole vehicle. Then take one full side shot of the driver side and one full side shot of the passenger side. These images establish overall condition and show if any panels look misaligned.
Front end: Photograph the front bumper from centre and both corners. Include the lower lip and grille area, where scrapes and stone chips are common. Crouch slightly to capture the underside edge, as kerb scrapes can be hidden from standing height.
Rear end: Do the same for the rear bumper, including the corners and the lower edge near the exhaust. If the vehicle has a tow hitch or rear sensors, capture them too, as they can show impact marks.
Doors, sills, and rocker panels: Photograph each door skin at an angle that catches reflections. Small dents often appear only when the light rakes across the surface. Then photograph the sills below the doors, as these areas can be scratched by shoes and kerbs.
Bonnet and roof: Take a photo of the bonnet from above and at an angle. If you can safely do so, photograph the roof from a distance to show hail dents or scratches. If you cannot see the roof clearly, note that in the report rather than guessing.
Wheel arches: Photograph the lip of each arch. Pennsylvania roads can involve gravel, winter grit, and construction debris, so arch edges may have chips that are easy to overlook.
Wheels and tyres: close-ups that reduce ambiguity
Wheels are a common chargeback area because curb rash can be hard to date. Take a close-up of each wheel face, filling most of the frame, then a second shot of the wheel at a slight angle to show depth and the rim edge. If there is damage, take an additional close-up with your finger or a key fob nearby for scale, without touching the damaged area.
For tyres, photograph the sidewall on each wheel, looking for bulges, cuts, and gouges. Also take one photo that shows tread depth across the tyre. You are not measuring to a millimetre, but you are showing that tyres were serviceable at pick-up.
If you are hiring a larger vehicle, the same logic applies, just expanded. If your trip involves moving gear or you are considering alternatives, van hire in Philadelphia may have different pre-departure checks, especially around body height and loading areas.
Glass, mirrors, and lights: capture chips properly
Glass damage can be tiny but expensive. For the windscreen, take a wide shot from outside to show overall condition, then a close-up of the lower corners and the area in the driver’s sightline. Look for star chips and faint cracks. Photograph them from outside and inside if possible, as some chips show better from a different angle.
For windows, take one photo per side showing the window closed, plus a close-up if you spot scratches. For mirrors, photograph the mirror housing and the mirror glass, including any scuffs on the outer edge.
For lights, capture each headlight and tail light lens straight on, then at an angle. Lenses can have cracks, condensation, or missing trims that should be recorded. Also photograph fog lights and indicators if fitted.
Interior: document cleanliness and any existing damage
Interior condition can matter just as much as exterior, particularly for stains, tears, odours, and missing equipment. Start with wide shots, then move to specific wear points.
Wide interior shots: Photograph the front cabin from the open driver door, then from the open passenger door. Take a wide shot of the rear seats, and one of the boot area with the boot open.
Seats and trim: Photograph the driver seat cushion and side bolster, as these show wear first. Do the same for the front passenger seat and any visible tears in the rear. Capture door cards, armrests, and centre console, especially around cupholders and storage where sticky residue can be blamed on the last driver.
Floor mats: Lift each mat and photograph beneath it. This is useful if there is dampness, heavy dirt, or tears. If mats are missing, photograph the bare floor and ensure the report mentions it.
Boot and spare tyre kit: Photograph the boot floor, the parcel shelf if present, and any spare wheel area. If there is a tyre inflator kit or jack, photograph it in place to show it was present at pick-up.
Keys and accessories: Photograph the key fob, any additional keys, and any supplied items such as a toll transponder unit, phone mount, or charging cable. The condition report may list these, so your photos help confirm what you received.
Dashboard: fuel, mileage, warning lights, and settings
Your dashboard photos should be crisp and readable. Take them with the ignition on, while parked safely, before you move the vehicle.
Odometer: Photograph the mileage clearly. This helps if mileage limits apply or if there is later confusion about whether the vehicle was swapped.
Fuel gauge: Photograph the fuel level as displayed. If the policy is full-to-full, you want proof of the starting level. If it is not full, ensure the report reflects that accurately.
Warning lights: Photograph the instrument cluster showing any warning lights that remain on. If a tyre pressure warning or engine light is present, do not assume it is normal. Ensure it is recorded, and consider requesting advice before departing.
Time and date: If your dashboard display shows time and date, include it in at least one photo. Otherwise, your phone’s metadata still helps, but an on-screen timestamp can make the timing obvious.
Underbody edges and hard-to-see areas worth a quick shot
You do not need to crawl under the car, but you should photograph the areas most likely to be scraped. Take low angle photos of the front lower bumper edge and the rear lower bumper edge. If the car sits low, also capture the side skirt area. These quick shots can prevent later disputes about underside scuffs.
If the vehicle has a roof rack, bike rack, or tow bar, photograph it from multiple angles. Accessories are often overlooked on reports, and damage to them can be expensive.
Matching your photos to the condition report in Pennsylvania
A condition report often uses a diagram with marked areas and short notes like “scratch” or “dent”. Your photos should mirror that structure. If the report marks the front right bumper, your photos should include a wide front shot plus a close-up of the exact mark. If the report says “scratch 3cm”, take a close-up that shows size, but do not rely on rulers unless you have one to hand. A common object for scale can work as long as it is not misleading.
When something is missing from the report, request that it is added before you accept the car. If you cannot get the report updated, photograph the damage clearly and take a photo of the report page to show it was unrecorded at departure. Keep your tone factual. The aim is accurate documentation, not an argument.
Different desks and operators may handle this slightly differently. If you are browsing supplier options in Philadelphia, pages such as Hertz car rental in Philadelphia (PHL) and National car rental in Philadelphia (PHL) can be useful for comparing what information is presented during the rental process, but your photo checklist remains the same.
Common mistakes that make photos less useful
Only taking wide shots: Wide shots prove general condition, but they rarely show the exact scratch or chip. Always add close-ups of any marked area.
Shooting at night with glare: Flash glare on paint can hide scratches. Take one photo with flash and one without if glare is strong.
Forgetting wheels: Many people photograph panels and forget rims. Take them systematically, one wheel at a time.
Not linking photos to the specific car: Include the number plate and, if possible, the VIN plate. This is especially helpful in large Pennsylvania airport lots.
Driving off before dashboard documentation: Odometer and fuel photos are most credible before any miles are added.
How many photos is enough?
For typical car hire, 25 to 40 photos is usually sufficient if they are well planned: 8 to 12 wide exterior shots, 8 wheel and tyre shots, 6 glass and lights shots, 6 interior and boot shots, plus 2 to 4 dashboard shots. Add extra close-ups only where damage exists. The right number is the number that makes each report item verifiable.
FAQ
Q: Should I photograph the condition report itself?
A: Yes. Take at least one photo of the report page or screen showing the damage diagram and notes, so your images can be matched to what was recorded.
Q: What if it is raining or the car is dirty at pick-up?
A: Photograph the dirt or water on the body, then focus on close-ups where marks are visible. If you cannot confirm an area due to grime, ask for it to be noted before departure.
Q: Do I need to photograph the roof and bonnet every time?
A: Photograph the bonnet and take a best-effort roof photo from a distance. These areas can hide hail dents and scratches, and a quick shot adds useful context.
Q: What dashboard photos matter most for car hire in Pennsylvania?
A: Odometer, fuel level, and any warning lights matter most. If the screen shows time and date, include that too for clearer timing.
Q: Is a video walkaround better than photos?
A: A short video can help, but it often misses detail. Use photos for close-ups and key readings, and treat video as supplementary evidence.


