Quick Summary:
- Photograph fuel gauge and odometer with ignition on, time-stamped.
- Walk around the car, capture all sides, corners, and close-up scuffs.
- Record roof, wheels, windscreen, and interior, including boot and mats.
- Save pump receipt and return-area signage photo showing location and time.
Returning a car hire at LAX can feel rushed, especially if you are juggling bags, passengers, and a shuttle deadline. The simplest way to protect yourself from later billing is to take a structured set of photos that prove three things at the moment you handed the car back: the fuel level, the mileage, and the vehicle’s condition. Your phone is enough, but only if you capture the right evidence in the right order, with clear context.
This checklist is designed to match the typical Los Angeles airport return flow. The goal is a small, repeatable sequence you can do in a few minutes without missing anything that matters. If you later receive a charge for refuelling, extra miles, cleaning, or damage, you will have a tidy set of images that are easy to share and hard to dispute.
If you are comparing options for car hire around the airport, it can help to review specific LAX pages such as car hire Los Angeles LAX, or supplier and vehicle category pages like Hertz car rental Los Angeles LAX and van rental Los Angeles LAX. The photo process below applies regardless of brand, because it is about documenting what you returned.
Before you arrive: set up your phone for usable proof
Do this before you enter the airport approach roads, when it is safe. First, clean your camera lens. Then enable date and time capture. Many phones store this in photo metadata, but it helps to have visible context too, so plan to photograph return-lane signage later.
Set your camera to the standard photo mode, not portrait, and avoid filters. If your phone has a setting for “high efficiency” formats, consider switching to most compatible so images open easily on any device. Finally, ensure battery is above 10 percent and storage is available. A half-finished checklist because your phone died is a common failure point.
Timing: the best moment to photograph fuel and mileage
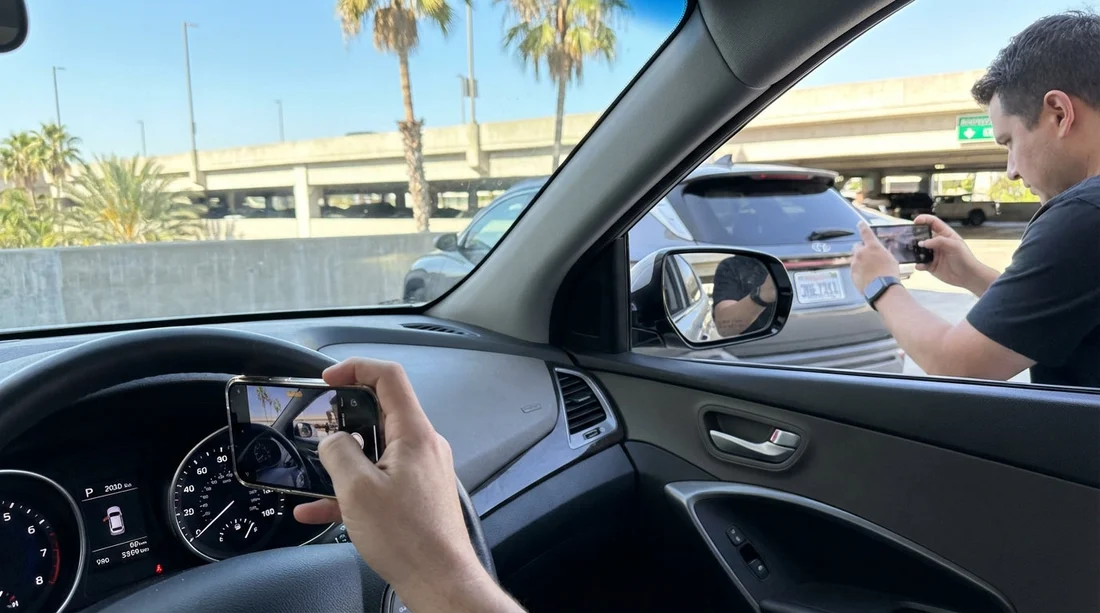
Fuel and mileage disputes usually come down to one question: what did the gauges show at the return point, not after the car was turned off. The best moment is immediately after you enter the return area, before you speak to an attendant and before you unload. Keep the engine on, shift to park, apply the handbrake, then begin the “dashboard set”.
Take photos in this order, without moving the car:
1) Fuel gauge close-up: Frame the fuel gauge clearly, with the needle or bars visible. Avoid glare. If the car shows “miles to empty” or a fuel percentage, include it.
2) Odometer close-up: Photograph the odometer reading. If the display cycles, wait until the total mileage is shown, not trip mileage.
3) Wide dashboard shot: Step back and take one photo that includes both the fuel gauge and odometer in one frame. This is important because it links the two readings to the same moment.
4) Ignition context: Take a photo showing the car is on, for example, dashboard lights or “Ready” indicator for hybrids. This helps if someone claims the gauges were read incorrectly after power-off.
If you refuelled just before returning, also photograph the pump screen showing litres or gallons and total cost, then keep the printed receipt. A digital wallet record is useful, but the receipt plus a pump display photo is stronger because it shows the quantity delivered.
Return lane context: prove where you were and when
Next, take one or two photos that anchor your set to the LAX return environment. Stand safely by the car and photograph a sign that identifies the return facility, lane, or company return entrance. If there is a bay number or return receipt station, capture that too.
This context matters because disputes sometimes involve confusion about whether the car was returned at the correct place, or at a different time. A simple sign photo, combined with your phone’s timestamp, adds credibility without slowing you down.
Exterior walkaround: a fast, complete sequence
Now do a systematic exterior walkaround. The trick is consistency: cover every panel and every corner, and include close-ups for anything that looks questionable. Aim for clear, level shots, not artistic angles.
Start with four “corner” photos: front-left corner, front-right corner, rear-right corner, rear-left corner. Each should include the bumper, lights, and a portion of the side panel. Corner photos capture most common damage areas and show alignment.
Then four “side” photos: full driver side, full passenger side, full front, full rear. Step back far enough that the entire side is visible. These shots help prove there was no large dent, scrape, or missing trim.
Then close-ups where needed: If you see scuffs on the bumper, curb rash on a wheel, or chips on paint, take two close-ups, one tight shot and one slightly wider shot that shows where it is on the car. This prevents arguments about scale or location.
If you want to be extra safe, record a short video doing the same walkaround, slowly. Video is not a replacement for photos, but it can show continuity and reduce “that scratch was not there” claims. Keep it short so it uploads easily if you need it later.
Wheels and tyres: common billing hotspot
Wheel damage is frequently charged because it is easy to miss during pick-up and return. Photograph each wheel straight-on, then at a slight angle to show the rim edge. Include the tyre sidewall in the frame, because sidewall damage can be billed separately from rim rash.
Do not rely on one photo for multiple wheels. Take four distinct wheel shots. If you have time, add a fifth and sixth for the spare tyre area or tyre tread depth, but the four wheel faces are the minimum for a defensible record.
Roof, windscreen, and mirrors: don’t skip the high and fragile parts
At airport lighting angles, windscreen chips and roof scratches can be hard to see. Take a photo of the windscreen from outside, then a second from an angle that catches reflections. If there is a known chip, photograph it from inside and outside to show it existed at return, and to show approximate size.
For the roof, open your phone camera and hold it above head height, or use a wide-angle lens if available. Take at least one roof shot, plus one of the bonnet and one of the boot lid. Mirrors should be photographed from both sides, especially the outer edge where scrapes happen.
Interior and boot: prove cleanliness and missing items
Cleaning fees and “missing equipment” charges are easier to dispute with a few quick interior photos. Before you unload everything, take interior shots that show overall condition.
Driver area: Photograph the driver seat, floor mat, pedals area, and centre console. Make sure any litter is removed first, so you do not accidentally document a mess.
Rear seats: One wide photo of the back seat area, then a close-up if there are marks.
Boot/trunk: Photograph the empty boot after you unload. If there is a parcel shelf or cargo cover, photograph it in place. If you used a van, photograph the load area walls and floor, which are common scrape points.
Also photograph any accessories you were provided, such as child seats, GPS units, charging cables, or toll devices, showing they are present and returned. If there is a key fob and a spare key, capture both together to avoid “one key missing” claims.
Fuel proof: receipts that actually help
A pump receipt is most useful when it clearly matches your return. If possible, refuel within a short distance of LAX so the mileage between filling and drop-off is minimal. Keep the receipt and photograph it laid flat, readable, showing date, time, and location.
If the receipt is faded, take two photos, one with flash and one without. If you paid at the pump and only have a digital record, screenshot the transaction, but still try to obtain a printed receipt where possible. Store these images in a single album titled “LAX return” so you can find them quickly.
Hand-off moment: the one photo people forget
If an attendant inspects the car and provides a return slip, photograph the slip immediately. If there is no slip and the return is “express”, photograph the dashboard again after you have parked in the assigned bay, then photograph the bay number or lane marker.
If you speak to an agent who confirms “all good”, you cannot record that as proof unless you have their written note, so focus on objective evidence: the car’s condition, the readings, the location, and the time.
How to organise and keep your evidence
Once you are on the shuttle or inside the terminal, spend one minute checking that your key images are readable: fuel, odometer, four corners, four sides, four wheels, roof, interior, boot, receipt, and return slip. If any are blurry and you are still nearby, retake them.
Back up the photos to cloud storage. Keep the originals, do not edit or crop, because metadata can matter. If you need to send proof later, share copies while retaining originals. Create a simple naming system in your gallery notes, for example “Fuel”, “Odo”, “Front-left corner”, which makes it easier to reference in emails.
If your trip includes other Southern California airports, the same process applies. Some travellers compare Los Angeles and Orange County pickup and return logistics, so pages like car rental airport Santa Ana SNA and car hire Santa Ana SNA can help you plan timings, but the evidence you collect should be consistent at any return location.
Common billing scenarios and which photos beat them
Refuelling charge: Fuel gauge photo with ignition on, plus pump receipt photo. If your car shows “range”, include that too.
Extra mileage or late return: Odometer photo, return-lane signage photo, and return slip photo. Metadata timestamps support the sequence.
Scratch or dent claim: Corner and side photos, plus close-ups of pre-existing marks. Roof and bumper corners are especially important.
Wheel damage claim: Four wheel face photos, with rim edge visible. Add close-ups if you notice any curb marks at return.
Cleaning fee: Interior wide shots, boot empty shot, and floor mat condition. These show you returned it in reasonable condition.
FAQ
Do I need to take photos before and after returning the keys at LAX? Yes. Take the full set before you hand off the keys, then a quick final set after parking, including the bay or lane marker and a last dashboard shot if safe.
Is a video better than photos for proving condition? A short walkaround video is helpful, but photos are usually clearer for specific details like wheel rash, chips, and fuel readings. Use both if you have time.
What if the fuel gauge drops slightly after I turn the car off? Photograph the fuel gauge with the ignition on first. A wide dashboard photo that includes both fuel and odometer helps show the reading at return time.
How many photos are enough to dispute a damage claim? Aim for at least 20 to 30: dashboard set, return signage, eight exterior frames, four wheels, roof, windscreen, interior, boot, plus any close-ups and receipts.
Should I photograph the return attendant or their badge? It is better to photograph the return slip and the vehicle in the return bay. People’s details are rarely necessary, while a clear condition and location record is usually decisive.


