Quick Summary:
- Photograph the whole car first, then close-ups of every marked panel.
- Use flash plus a torch, and capture the bay signage.
- Film a slow walkaround, narrating time, mileage, and existing damage.
- Upload evidence immediately, and email the desk before leaving MCO.
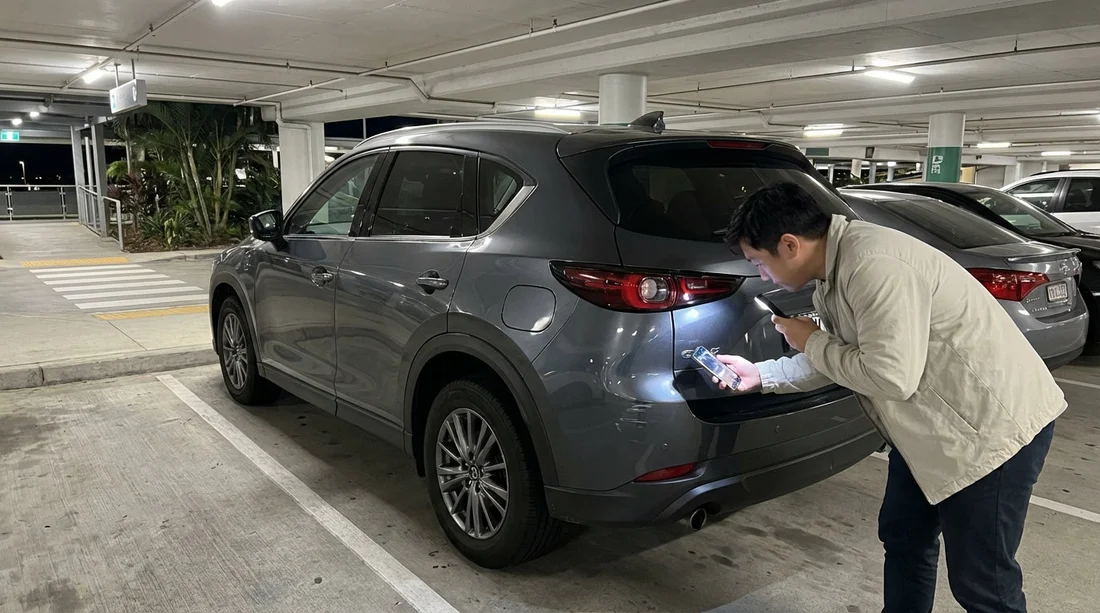
Picking up a car hire at Orlando International Airport (MCO) at night can feel rushed. Multi-storey garages, uneven lighting, and tired travellers all make it easier to miss pre-existing marks. The good news is that a clear, repeatable documentation routine protects you at return, because you can show exactly what was already there.
This guide gives you a step-by-step, low-light photo checklist for MCO pick-ups, with practical camera settings and a simple file naming system. If you are arranging an Orlando airport pick-up through Hola Car Rentals at MCO, the same approach works across suppliers and vehicle types.
Before you reach the car: set up your evidence kit
You do not need specialist gear, but you do need consistency. Do these five things before you walk into the garage:
1) Clean your lens. Low light exaggerates smears and creates glare halos, which can hide small scratches.
2) Turn on timestamp options. If your phone supports it, enable date and time in photo info. Do not use heavy filters or “beauty” modes that soften detail.
3) Switch to the right camera mode. Use standard Photo plus Video. If you have a “night” mode, it can help, but it sometimes blurs if your hands move. In garages, flash is often more reliable for sharp close-ups.
4) Bring a light source. A small torch or your phone torch helps you “rake” light across paint to reveal dents and scuffs. Aim the beam from the side, not straight on.
5) Create a folder now. Name it something you will recognise later, such as “MCO pickup Jan 2026”. If you have cloud backup, make sure it is on. Evidence is only useful if you still have it at return.
If you are comparing airport collection options for Orlando car hire, you can also read the pickup basics on car hire airport Disney Orlando MCO. The garage layout and time pressure are exactly why documentation matters.
At the bay: capture location and identity first
Start by proving where you are and which car you received, before you prove the damage. This prevents confusion if there are multiple similar vehicles nearby.
Step 1: Photograph the bay context. Take two wide photos that include the car and something fixed, such as a pillar number, floor marker, or overhead sign. Do one with flash and one without flash. Wide “context” photos help confirm you were in the multi-storey garage at pickup time.
Step 2: Photograph the registration plate and the whole vehicle. Take front and rear plate photos, then four corner shots (front-left, front-right, rear-left, rear-right) from about two metres away. Keep the wheels visible, because kerb rash is common.
Step 3: Photograph mileage and fuel/charge level. Before you drive off, take a clear photo of the dashboard showing the odometer and fuel gauge or EV charge percentage. If the vehicle uses a digital start sequence, record a short video while the display stabilises so you can later pause on the best frame.
Step 4: Photograph the rental agreement or key tag. If you have paperwork showing the vehicle class or plate, capture it. If you only have a key fob tag, photograph that instead. This ties your media to the correct car.
The low-light exterior checklist (work clockwise)
Use a clockwise loop so you do not miss panels. The rule is simple: wide shot for context, then close-up for evidence. For every mark you find, take at least two angles and one photo with flash.
Front bumper and grille: Look for scrapes under the lip and cracked plastic around parking sensors. Crouch and use your torch from the side to reveal gouges.
Bonnet and front wings: Stone chips show best with flash. Take one photo square-on, then one at a shallow angle to show paint depth.
Headlights and fog lights: Photograph hazing, cracks, or moisture inside the lens. Make sure the light unit fills most of the frame.
Windscreen: Chips can be tiny. Use the torch beam across the glass and take a close-up of any pit or star crack. Also capture the area around the wipers, where scratches can sit.
Driver side doors: Pay attention to door edges and handles. In garages, door dings are common at mid-height. Place your torch against the panel and sweep it across to reveal dents.
Sills and lower trims: These are easy to miss at night. Angle the torch low and parallel to the sill. Photograph any crushed plastic clips or missing trim pieces.
Wheels and tyres: Take one photo per wheel that clearly shows the rim edge. Then take a close-up of any kerb rash. Also capture tyre sidewalls for bulges or cuts.
Rear quarter and rear bumper: Scrapes often hide under the bumper. Crouch again, take a wide shot for panel position, then close-ups with flash.
Boot or tailgate: Check the loading lip for scuffs. Photograph any dents near the latch and any cracks in the tail light lenses.
Roof (if possible): If you cannot safely photograph the roof, do not climb on anything. Instead, take a video tilting upward from each corner. This at least shows whether there were obvious roof dents or missing shark-fin trim.
For travellers choosing between different suppliers, the documentation routine stays the same. If you are reviewing options like Budget car hire Orlando MCO or Avis car rental Orlando MCO, consistent evidence is what helps later, regardless of which desk issued the keys.
Interior and function checks that support your damage claim
Most disputes are about exterior paint, but interior photos can support your credibility and show you checked properly.
Seats and trims: Photograph any tears, stains, or burns. Use flash for fabric texture. If there are child-seat marks or deep indentations, capture them clearly.
Dashboard warning lights: Take a photo with the ignition on. If a tyre pressure or engine warning is lit at pickup, record it immediately. This is not about blame, it is about proving timing.
Keys and accessories: Photograph the key fob, any remote start fob, charging cable, or spare items supplied. Missing accessories can also cause end-of-hire issues.
Boot contents: Lift the boot floor if there is a storage area and take a quick photo. This helps if you later find missing tools or a broken cover.
How to take garage-proof photos (simple settings that work)
Low-light garages create three problems: blur, glare, and loss of scale. Use these fixes:
Use flash for close-ups. Flash freezes motion and shows paint edges. If glare is too strong, step slightly to the side and retake from a different angle.
Stabilise your hands. Brace elbows against your body or a pillar. Hold your breath briefly for the shot.
Include scale. For small chips, take one close-up, then a second shot with the door handle, wheel arch, or badge in frame. This proves location without using objects that could be questioned later.
Tap to focus. On phones, tap the scratch itself. If the camera focuses on the background lights, the damage will look softer than it is.
Do not over-edit. Avoid auto “enhance” that can remove fine scratches. Keep originals.
The walkaround video: your strongest single piece of evidence
A continuous video ties everything together and demonstrates you did not selectively photograph only the worst areas.
How to film it: Stand at the front-left corner. Start recording and say the date and time, “MCO pick-up”, and the registration plate. Then slowly walk clockwise, keeping the camera at chest height for wide context and dipping down for wheels and bumper edges. Finish by filming the dashboard mileage and fuel level again.
Keep it slow and quiet. Fast pans create blur. If the garage is noisy, do not worry, the visuals matter most. If narration is unclear, you still have the audio timestamp and continuous footage.
How to store and label your evidence so it is usable
The best evidence is organised evidence. Use a simple naming pattern as soon as you can, even while walking to the lift.
Suggested file names: “01_context_floor-sign.jpg”, “02_front-left-wide.jpg”, “03_front-bumper-scratch-close.jpg”, “04_wheel_FL_kerb.jpg”, “05_dashboard_mileage-fuel.jpg”, “06_walkaround_video.mp4”.
Back it up immediately. Upload to your cloud storage or email it to yourself. If your phone is lost, damaged, or runs out of space, you still have proof.
Keep originals. Do not delete the unedited versions. If you crop a photo for clarity, keep the uncropped original too.
Reporting damage before you leave the garage (without slowing your trip)
Once you have photos and video, report notable marks promptly. The goal is a time-stamped record that you raised the issue early.
What to report: Anything beyond tiny stone chips, plus any wheel rash, dents, cracked lights, or windscreen chips. Also report warning lights on the dash.
How to report: If the desk is open, show the key images and ask for the damage to be noted. If it is closed, use the supplier’s after-hours process if provided, and email customer support with two or three key photos plus the plate and pickup time. Keep your message factual and brief.
Do not rely on memory. “Already marked on the sheet” is not enough unless you can prove what was marked. Your photos do that.
Return-day strategy: match your pickup evidence, then add new proof
At return, repeat the same pattern, even in daylight. Recreate the four corner shots and wheel photos, then film a quick walkaround. If someone queries a mark, you can immediately show the pickup image with the same panel angle.
Tip: If the return lane is busy, do your photos before you enter it, in a safe nearby spot, then again at the bay if lighting differs. Two sets can prevent arguments about reflections or shadows.
Keep receipts. If you refuelled, keep the receipt. If you used tolls, keep records. While not “damage” evidence, it helps resolve other common car hire queries quickly.
FAQ
Do I need to photograph every tiny chip on an Orlando car hire? Focus on anything noticeable: dents, scrapes, cracked lights, wheel rash, windscreen chips, and long scratches. Wide shots plus key close-ups are usually sufficient.
What is the best way to show scratches in low light at MCO? Use flash for sharpness, then take a second angle with a torch shining across the panel from the side. The side light reveals depth and makes dents and scuffs stand out.
Should I take photos before or after leaving the garage level? Take your main set before moving the car. Once you drive off, it becomes harder to prove the mark existed at pickup, especially if staff assume it happened while exiting.
How many photos is enough for a night pick-up? Aim for 15 to 30 photos plus one continuous walkaround video. That typically covers four corners, all wheels, dashboard, and any specific damage close-ups.
What if the rental desk is closed and I cannot get damage noted? Take thorough photos and a walkaround video, then report the damage through the supplier’s after-hours process or by email as soon as possible, including plate, time, and clear images.


