


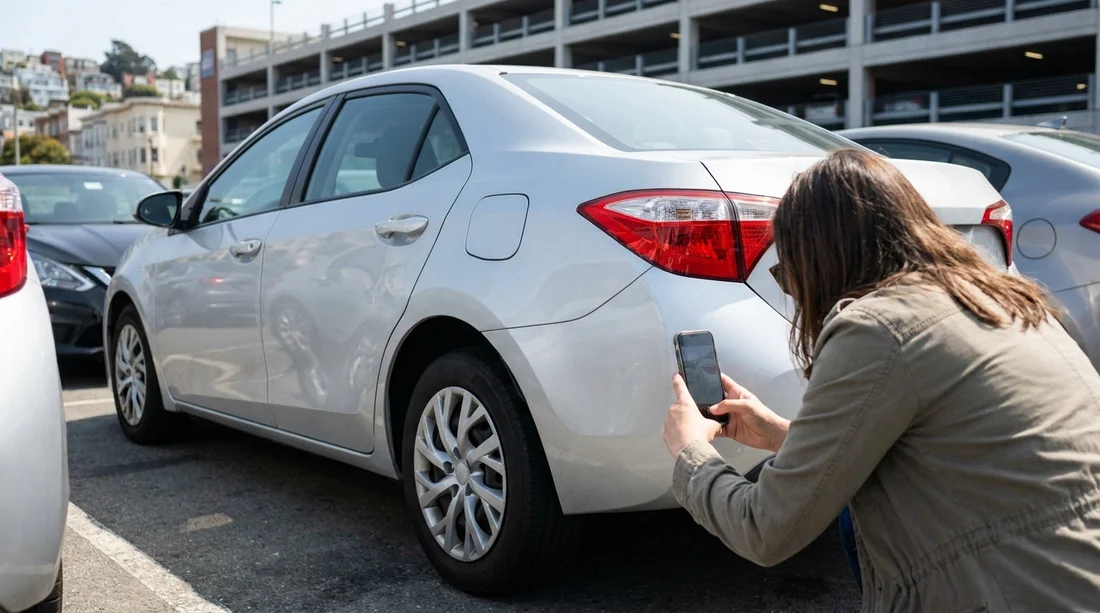
Quick Summary:
- Photograph all four sides, the roof, and wheels in clear light.
- Capture close-ups of any scuffs, cracks, chips, rust, or missing trim.
- Snap the dashboard showing mileage, fuel level, warning lights, and time.
- Photograph the rental agreement, damage sheet, and key fob details.
Picking up a car hire in San Francisco can feel fast-paced, especially at the airport when queues move quickly and staff are trying to keep traffic flowing. A short, consistent set of photos taken before you leave the car hire centre can prevent confusion later if a scratch, ding, or missing accessory is noticed at return. Think of it as creating a clear, time-stamped record of what you actually received.
The goal is not to take hundreds of images. It is to take the right images, from the right angles, with details that are easy to match to the car and the paperwork. If you are collecting at San Francisco SFO Airport car hire or another busy location, this checklist helps you move quickly while still being thorough.
Before you start, set up your phone for clearer proof
Stand where you have space, turn on good lighting if it is dim, and take photos before you drive out of the bay. If your phone allows it, ensure the date and time are correct and that location tagging is enabled, as this can help establish when and where the photos were taken. Avoid wide-angle distortion when photographing panels. A normal lens view makes scratches and alignment easier to judge.
Take photos in a simple order each time: outside first, then inside, then dashboard and paperwork. If you are picking up via San Francisco car hire, you may have a short walk to the vehicle, so start recording once you are next to the car and can include its licence plate in at least one frame.
Exterior photos to take, start wide then go close
1) Four-corner walkaround
Take one wide photo from each corner: front-left, front-right, rear-left, rear-right. Ensure the entire vehicle is in frame and the ground is visible. These images show overall condition and can reveal panel misalignment that indicates previous damage.
2) Full side profiles and the roof
Take one photo of the driver side and one of the passenger side, straight on. If you can safely do it, capture the roof too, particularly on SUVs where roof scrapes can happen in car parks. If you are hiring something larger, like via SUV hire in San Francisco SFO, roof and upper tailgate marks are worth checking carefully.
3) Bumpers, grille, lights, and windscreen
Photograph the front bumper and grille area, then the rear bumper, including corners where scrapes are common. Take clear shots of both headlights, both tail lights, and the windscreen. In San Francisco, street parking can be tight, so pre-existing bumper scuffs are common and should be documented before you drive off.
4) Wheels, tyres, and hubcaps
Take a photo of each wheel straight on, plus an angled close-up that shows the rim edge where kerb rash appears. Also capture tyre condition if it looks low or uneven. If there is a spare tyre or tyre inflator kit listed on the paperwork, you will check that inside later.
5) Number plates and identifying stickers
Take one photo showing the rear number plate clearly. If there is a fleet barcode, parking permit, toll tag, or vehicle ID sticker on the windscreen or door jamb, photograph it. This ties your images to the specific car, which is helpful if many similar vehicles are parked together.
Close-ups, what counts as “damage” for your photos
Anything that could be interpreted as caused during your hire is worth capturing. That includes scratches through paint, dents, cracked trim, chipped windscreen areas, scuffed bumpers, damaged wheel rims, missing hubcaps, and torn rubber seals. When you find an issue, take two photos: one close enough to show detail and one a step back to show the location on the car.
If the car is wet, dirt can hide scratches. Angle your phone so reflections show the panel surface, and take an extra close-up. If lighting is poor, use your torch, but avoid glare by holding the light to the side.
Interior photos that prevent common return disputes
1) Seats, carpets, and boot area
Open each door and take a photo of the seats and footwells, especially if there are stains, rips, burns, or pet hair. Photograph the boot or cargo area floor and side panels. If the rear seats fold, do a quick look for damage marks in the hinges or latches.
2) Dashboard, centre console, and infotainment screen
Take a clear photo of the centre console and any screens. If there are scratches around ports, missing knobs, or sticky buttons, capture them. If you plan to use Apple CarPlay or Android Auto, documenting the cable ports can help if anything is already loose.
3) Accessories and safety items
Photograph anything listed as included: parcel shelf, luggage cover, floor mats, and cargo net. If the documentation mentions a warning triangle, first-aid kit, or spare wheel, photograph what you find and where it is stored. Missing accessories are a frequent source of end-of-hire confusion.
The must-have dashboard photos, fuel, mileage, warning lights
This is the set that can save the most time later. Before driving away, turn the ignition on and photograph the instrument cluster.
1) Odometer (mileage)
Take a photo that clearly shows the odometer reading. This helps if there is any question about mileage allowances or if the agreement is entered incorrectly.
2) Fuel level
Photograph the fuel gauge. Also photograph any fuel policy on your paperwork. If the gauge shows less than expected, raise it immediately so it can be noted.
3) Warning lights on start-up and after start
Many lights appear briefly at start-up, but any persistent warning light is worth documenting and reporting. Take a photo with the engine running if a warning remains. If you see a tyre pressure warning, check tyres visually and make sure the company notes it.
Paperwork and key photos that complete the record
1) Rental agreement and vehicle description
Photograph the first page of the rental agreement showing the vehicle class, pick-up time, and assigned vehicle details. If the agreement lists existing damage, photograph that section too.
2) Damage diagram sheet
If you are given a diagram with marked dents or scratches, photograph it clearly. If you find damage that is not marked, ask staff to add it, then photograph the updated version.
3) Key fob and any separate keys
Take a photo of the key fob and any additional keys. If there is a code tag, photograph it. Key replacement fees can be significant, so it helps to document what you received.
A fast, repeatable “60-second” photo order
If you want the quickest method, do it in this sequence: rear number plate and full rear view, rear-left corner, driver side profile, front-left corner, full front view, front-right corner, passenger side profile, rear-right corner. Then each wheel, then the dashboard with fuel and mileage, then the agreement and damage sheet. This keeps you moving around the car once, with no backtracking.
Whether you arranged your car hire through San Francisco SFO car rental or another San Francisco location, this routine gives you a consistent set of proof each time you collect a vehicle.
Where to store the photos so you can find them at return
Create a dedicated album named with the pick-up date and “San Francisco car hire”. Keep the photos in order. Do not edit images heavily, as edits can remove metadata.
Finally, do a quick review before leaving the car hire centre car park. If you missed a side or a wheel, it is far easier to fix it immediately than later when you are already in traffic.
FAQ
Q: How many photos should I take before leaving the car hire centre?
A: Aim for 20 to 35 photos, four corners, both sides, each wheel, key details, dashboard, and paperwork. That is usually enough to document condition without slowing you down.
Q: Should I take photos even if the car looks brand new?
A: Yes. Photos still confirm fuel level, mileage, and that there were no visible marks at collection. They also help if a later claim relates to an area you can show was clean.
Q: What if I notice damage after I have already driven away?
A: Photograph it immediately where you are parked safely, then contact the provider as soon as possible. Ask for the damage to be noted on your agreement and keep a record of the time you reported it.
Q: Do I need photos at return as well as at pick-up?
A: It is sensible. Repeat the same exterior and dashboard shots at return, including fuel and mileage, plus a photo of the car parked in the return area if possible.
Q: Are videos better than photos for documenting the car?
A: Videos are useful for context, but photos are better for sharp close-ups and specific details like scratches, wheel scuffs, fuel gauge, and the odometer.






























































































