


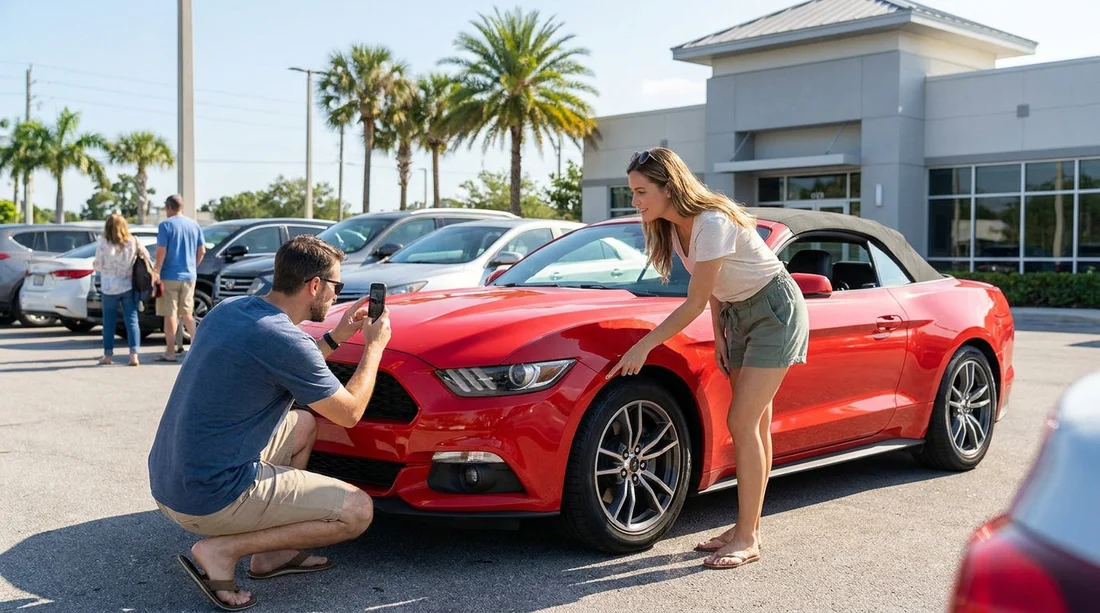
Quick Summary:
- Photograph fuel gauge, odometer reading, and dash warning lights together.
- Walk around slowly, capturing every exterior panel from multiple angles.
- Take close-ups of wheels, tyres, glass edges, and existing chips.
- Record paperwork, bay location, and a timestamped wide shot before leaving.
When you collect a vehicle for car hire in Florida, the best time to document its condition is before you leave the counter area and drive out of the lot. A clear, methodical set of photos can help resolve disagreements about pre-existing damage, fuel level, or mileage. It also saves time, because you can take the shots quickly and then enjoy your trip without second-guessing what you saw at pick-up.
The goal is simple, create evidence that is dated, comprehensive, and easy for a third party to understand. That means combining wide shots that prove overall condition with close-ups that show detail. Use your phone’s normal camera, keep the lens clean, and if possible turn on settings that preserve timestamps and location data.
Pick-up areas vary across Florida, from busy terminals at Miami Airport car hire desks to city locations like downtown Miami car rental. Wherever you collect the car, start photographing before you load luggage, because bags can block views, and time pressure can lead to missed angles.
Before you start, set yourself up for usable evidence
Stand where there is good light and enough space to step back. If you are in a shaded garage, tap the screen to focus, and take two shots when lighting is tricky, one with flash and one without. Avoid fancy filters or portrait mode, you want accurate colour and edges.
Take photos in a consistent order. A simple routine reduces omissions and makes your set easier to review later. If you are travelling with others, ask one person to hold paperwork while the other photographs, so nothing gets lost.
Shot list at the dashboard and cabin, capture fuel, mileage, and warning lights
Start inside, because the key facts are on the instrument cluster. Take a straight-on photo that includes the odometer, fuel gauge, and any visible warning lights. If the car uses a digital menu, scroll to the screen that shows total mileage and range, then photograph it.
Next, take a close-up of the fuel gauge alone, especially if it is not completely full. Follow with a close-up of the odometer reading. These close-ups can be vital if the combined photo is slightly blurred. Then take a photo of the ignition state with the engine on, if permitted, to show that any warning lights remain on after start-up, not just during the system check.
Finally, capture the centre console and infotainment area. Photograph any existing scratches, sticky buttons, missing knobs, or cracked screens. If the vehicle has a USB port or charging area you will rely on, a quick photo helps prove if something was already broken. Keep it factual, you are not looking for perfection, just clear documentation.
Full exterior walkaround, every panel, every angle
Now move outside and shoot a wide walkaround. The key is coverage, not artistry. Take photos from each corner, front-left, front-right, rear-left, rear-right, standing far enough back to include bumpers, lights, and adjacent panels. Then take side-on shots of the driver side and passenger side, capturing the full length of the car.
After the wide shots, work panel by panel. Photograph the bonnet, roof, boot lid, and both front and rear doors. Don’t forget the rocker panels and lower edges, because scuffs often hide there. For each panel, take one normal-distance photo and one closer shot of any marks.
If you are collecting a larger vehicle, such as from a SUV rental in Miami fleet, add an extra roofline and tailgate check. High vehicles pick up scratches around loading areas, and those spots are easy to miss unless you deliberately look.
Close-ups that matter most, bumpers, mirrors, glass, and lights
Bumpers and mirrors are common dispute points. Take close-ups of the front bumper corners, lower grille area, and rear bumper lip where luggage can scrape. Photograph both mirrors including their housings and edges, and make sure the image is sharp enough to show scuffs.
For glass, photograph the windscreen from outside at an angle that reveals chips. Then shoot the windscreen edges near the wipers and pillars, because small cracks often start there. Do the same for rear glass and side windows. If you find a chip, take one close-up with your finger near, without covering it, to give scale, then a second close-up without your hand so the damage is unobstructed.
Lights deserve attention too. Take clear shots of both headlamp units, tail lights, indicators, and fog lights if fitted. Lens cracks can be subtle but costly. A quick close-up of each light cluster is usually enough.
Wheels and tyres, prove condition and tread quickly
Wheel scuffs are frequent in Florida’s parking garages and kerbed hotel bays. Photograph each wheel straight-on, then a second angle that shows the rim edge. Include the tyre in the frame so you capture any sidewall damage.
Also photograph the tyre tread on at least one front and one rear tyre. You do not need a tool, just take a close-up from above so grooves are visible.
Number plate and proof you collected the right car
Take a clear photo of the front and rear number plate. This links your photo set to the exact vehicle, especially useful in large lots where many cars look similar. Keep these images for your records in case you need to reference them later.
If you are travelling through different parts of the state, for example flying into Tampa via Tampa Airport car hire and then driving across Florida, having the plates recorded can help if you misplace paperwork or need assistance.
Paperwork and context shots, make your evidence harder to dispute
In addition to car photos, take pictures of the rental agreement summary page that shows the checkout time, fuel policy, and any noted damage. If there is a damage diagram on the form, photograph it. If staff mark damage on a tablet, ask to see the final screen and photograph it if allowed.
Then take one wide context shot showing the car in its bay with nearby signage. This helps demonstrate where you collected it and supports the timeline.
If you notice damage that is not already recorded, photograph it, then go back to the counter or booth before driving away. Ask for the damage to be added to the record. Your photos support that request, but getting it documented by staff is even stronger.
How many photos is enough, and how long should it take?
A solid set is usually 25 to 45 photos. Done in order, it can take five to eight minutes. If you are in a rush, prioritise the dashboard cluster, four corner wide shots, both sides, all wheels, and any existing damage close-ups. That gives you a defensible minimum without missing the most disputed areas.
Common mistakes that weaken your pick-up documentation
First, taking only wide shots. Wide shots prove overall condition but often fail to show small chips and wheel scuffs. Second, photographing only damage you notice. You need baseline coverage too, so you can show you looked at everything, not just one spot.
Third, low light blur. In garages, steady your phone with two hands and take an extra photo if you are unsure. Fourth, forgetting fuel and mileage. Fuel disputes are avoidable if you photograph the gauge clearly at pick-up. Finally, keep your photos backed up, ideally in a dedicated album named with the pick-up date and location.
FAQ
Q: Should I take a video or photos for car hire pick-up documentation in Florida?
A: Photos are essential because they capture sharp detail. A short walkaround video can support them, but it should not replace still images of damage, fuel, and mileage.
Q: What is the single most important photo to take before leaving?
A: A clear, straight-on shot of the instrument cluster showing odometer, fuel level, and any warning lights provides immediate proof of mileage and fuel at pick-up.
Q: How do I photograph scratches and chips so they are easy to verify?
A: Take one mid-distance photo to show the panel location, then a close-up for detail. Use good light, tap to focus, and take a second close-up if the first is soft.
Q: Do I need to photograph the interior as well?
A: Yes, at least the dashboard, infotainment screen, and any obvious stains, tears, or broken trim. Interior issues can be disputed too, especially on high-turnover vehicles.
Q: What should I do if I find unrecorded damage after I have driven away?
A: Stop as soon as practical, take additional timestamped photos, and contact the rental provider to report it. Reporting quickly, with images, is better than waiting until return.






























































































