Quick Summary:
- Photograph each wheel straight-on, then two angled shots showing rim edges.
- Take close-ups of scuffs, plus tyre sidewall cuts and bulges.
- Capture the plate, mileage, and timestamped overview photos before leaving.
- Get the agent to write wheel damage notes on the agreement.
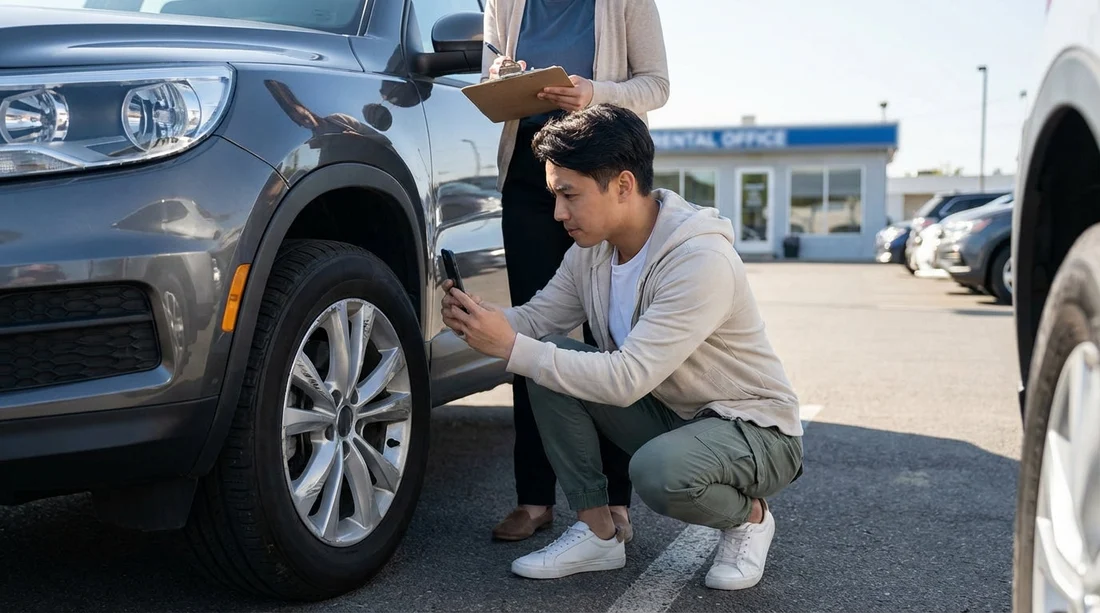
Alloy wheels are one of the most common damage hot spots on a rental car. Kerb rash, bent rims, and sidewall scrapes can be hard to spot in a busy pickup bay, and they are also easy to dispute later if you have not documented them properly. In California, where many pickups happen in multi-storey garages at airports and downtown locations, lighting and time pressure can make wheel checks feel rushed. The fastest way to protect yourself during car hire is to capture a consistent set of photos and ensure any existing wheel issues are written onto the rental agreement before you drive off.
This guide focuses on what to photograph, how to frame it, and exactly what to ask staff to record, so that a pre-existing scuff or bend cannot be misattributed to your trip.
Why wheels trigger disputes more than other marks
Wheel damage is often treated differently from light bodywork scuffs because it can affect safety and alignment. A bent rim lip, deep gouge, or sidewall damage can be linked to a pothole impact or kerb strike, even if it happened weeks earlier. Unlike a door ding, a wheel mark might not be obvious in one photo, so a single quick snap sometimes is not enough. For car hire in California, you want images that show condition, context, and identifiers in one coherent set.
Also, tyres and wheels accumulate grime quickly. A dusty rim can hide scratches, and a wet wheel after a wash can reflect overhead lights, making damage look worse or disappear entirely. Your goal is to create clear evidence of the exact state of each wheel at pickup, plus proof that you raised it immediately.
The fastest wheel photo routine that still holds up later
A strong routine is quick because it is repeatable. Plan on two minutes per wheel, plus one minute for a vehicle overview. If you are collecting at an airport location, build in extra time for lighting and moving safely around the car. For example, at Los Angeles Airport (LAX), garages can be dim and busy, so use your phone torch if needed and keep yourself visible to traffic.
Use your phone’s standard camera rather than a heavily processed mode. Turn on location and time in your camera settings if you are comfortable, or keep the receipt email for pickup time. Avoid filters. If your phone has a “macro” mode, use it only for close-up scuffs after you have taken context shots.
Shot list for each wheel, in order
Work clockwise from the front-left wheel so you do not miss one. Repeat the same sequence every time, then you will know you captured everything.
1) Straight-on full wheel photo
Stand about one metre away, camera level with the centre cap, and fill the frame with the entire tyre and rim. This establishes the wheel identity and overall condition. Make sure the valve stem area is visible on at least one of your straight-on shots, because it helps show you photographed that specific wheel.
2) Two angled rim-edge photos
Angle shots are where most disputes are won or lost. Take one photo from the front of the wheel looking along the rim edge, then one from the rear. The purpose is to show the lip and the outer edge where kerb rash lives. Keep the wheel in focus, and include a little of the surrounding body panel so it is clear which corner you are photographing.
3) Close-ups of any scuffing, chips, or bends
If you see a scuff, take two close-ups. First, a “medium” shot that shows the damage plus the centre cap or wheel spokes for orientation. Second, a tight close-up that shows texture, depth, and paint transfer. If you suspect a bend, photograph the rim lip at a shallow angle, and try to include a straight reference line like the edge of the brake disc behind it.
4) Tyre sidewall condition photo
Tyre sidewalls matter because sidewall cuts and bulges can be treated as impact damage. Take a photo that shows the whole sidewall branding and the rim edge together. Specifically look for chunks missing, fresh abrasions, bubbles, or cords. If you see anything, add a close-up with your finger pointing near, but not touching, the mark. This helps scale without hiding the damage.
5) One tread shot if the tyre looks questionable
You do not need this for every wheel, but if the tyre looks worn, take a tread photo. It supports a later argument that the issue was pre-existing, and it can be useful if you later feel grip was reduced in rain.
Must-have overview photos that link the wheels to the car
Wheel photos are strongest when tied to the vehicle identifiers.
Number plate and full vehicle
Take a photo of the number plate with the full front of the car visible, then one of the rear. If the plate is temporary or not present, photograph the stock number sticker on the windscreen and the vehicle from multiple angles.
VIN or door jamb label (if accessible)
If the driver door is unlocked and you can safely do so, photograph the VIN plate visible through the windscreen or the door jamb label. Not all locations allow this during pickup flow, so do not obstruct staff. If you cannot get the VIN, the plate plus contract number is still helpful.
Odometer and fuel/charge level
Take a quick photo of the dash showing mileage and fuel level or EV charge. It proves you were in the car at pickup time and adds credibility to your documentation set.
Lighting and angles, the details that make photos usable
Garages in California can have mixed lighting, sodium lamps, and harsh shadows. These tips keep photos clear without slowing you down.
Avoid glare
If the wheel is wet or glossy, step slightly left or right until reflections move off the damaged area. A scuff can vanish under a bright reflection.
Use the same distance
Consistency makes it easier for someone reviewing the file to understand the sequence. It also makes it clear you photographed all four wheels, not just one problem corner.
Hold steady and tap to focus
Blurry photos are easy to dismiss. Tap the damaged area to focus, and take two shots quickly in case one shakes.
Include context
A close-up without context invites arguments about which wheel it is. Always take at least one shot where spokes, centre cap, and damaged lip appear together.
What to write in your notes, the exact wording that helps
Photos help, but the strongest protection is having the damage logged on the agreement or the vehicle condition report. Your notes should be specific, neutral, and location-based.
Use wording like:
“Front-left alloy wheel: kerb rash on rim edge, approx 5 cm, at 2 o’clock.”
“Rear-right wheel: rim lip appears slightly bent near valve stem.”
“Front-right tyre sidewall: scrape marks, no visible cords, pre-existing at pickup.”
Avoid vague phrases such as “wheel scratched” without a corner reference. Clock-face positioning is fast and precise. If there are multiple marks, list the most significant one and say “additional scuffs present” so the record covers the general condition.
How to get damage logged before you drive off
Different pickup locations handle condition reporting differently. Some use a paper diagram, others use an app-based checklist, and some rely on a pre-printed inspection already completed. Your aim is to leave with a copy that includes your wheel note.
Step 1: Raise it immediately and politely
Before leaving the bay, show the agent the scuff or bend and ask for it to be recorded. If you are picking up in a busy location like San Diego, staff may try to reassure you verbally. A verbal acknowledgement is not enough on its own. Ask for the note on the agreement or the inspection report.
Step 2: Point to the exact wheel and position
Use your clock-face description while you show the mark. That makes it easy for staff to record quickly and reduces confusion between front and rear corners.
Step 3: Confirm it appears on your copy
If it is a paper form, ask for a copy or take a photo of the completed document. If it is digital, ask for the updated condition report to be emailed or made visible in the app. At an airport desk such as Santa Ana (SNA), this can take one extra minute, but it is the part that prevents later charges.
Step 4: If they cannot edit, create a written record anyway
If staff say the system cannot be amended, ask them to add a note in the reservation or comments field. If that still is not possible, send an email from your phone to the location’s published contact address with your rental agreement number and a short description, and keep the sent message. Even without an edit, a time-stamped written record plus your photos is far stronger than photos alone.
File management: make your evidence easy to find later
Disputes often happen days after return, when you are travelling or busy. Organise your evidence while it is fresh.
Create an album named with the date and pickup location, then keep the wheel photos in order: front-left, front-right, rear-right, rear-left. Add a screenshot of your agreement, and any condition report images. If your rental is through a branded counter, such as National at Santa Ana, include a photo of the counter paperwork or the digital check-out screen that shows the vehicle class and agreement number.
Common mistakes that lead to wheel damage charges
Only photographing the damaged area
A tight close-up with no context can be challenged. Always include at least one full wheel shot and one angled rim-edge shot.
Missing the tyre sidewall
Many disputes are framed as tyre damage rather than wheel damage. Sidewall photos reduce that risk.
Taking photos after leaving the lot
Once you drive off, it is easier for a company to argue the damage happened on your route out. Take your set before the first movement, even if it means stepping aside for a moment.
Assuming the pre-inspection covers wheels
Some inspection diagrams focus on body panels and ignore wheels. If the form has no wheel area, add a written note that explicitly mentions “alloy wheel” and the corner.
California-specific context: potholes, kerbs, and parking structures
Urban driving and coastal routes in California can involve steep kerbs, narrow parking garages, and occasional pothole impacts after rain. That makes wheel and tyre condition particularly sensitive on return inspections. If your trip includes dense city parking or beach towns with tight curbside spots, your pickup documentation becomes even more valuable. It is not about expecting a dispute, it is about making the condition clear to everyone from the start of the car hire.
FAQ
Do I need to photograph all four wheels if only one looks damaged? Yes. A full set shows you performed a consistent inspection at pickup and prevents confusion about which wheel had existing marks.
What if the pickup area is too dark for clear photos? Use your phone torch, change your angle to reduce glare, and take two shots per angle. If it is still unclear, ask staff to move the car slightly to better light before you depart.
Is a video better than photos for documenting alloy wheel condition? Video can help, but photos are easier to review and print. If you take video, still take the key photos: full wheel, two rim-edge angles, and close-ups.
What notes should be on the agreement to protect me later? The note should name the corner, describe the damage type, and give a position and size estimate, for example “rear-left alloy wheel kerb rash 4 cm at 7 o’clock”.
If staff refuse to add the damage, should I still take the car? If you must leave, keep comprehensive photos and create a time-stamped written record tied to your agreement number, then report it immediately through the location’s contact channel.


