


Quick Summary:
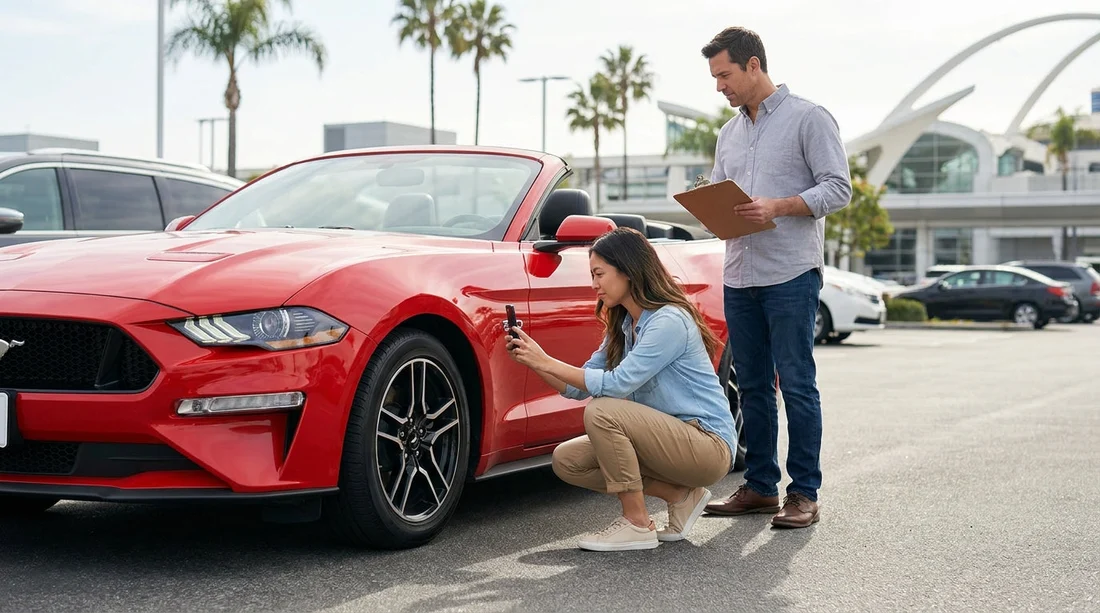
- Photograph every panel, wheels, glass, roofline, and the full interior.
- Match fuel level, mileage, and timestamps to your rental agreement details.
- Record existing damage on the check-out sheet and get it acknowledged.
- Test lights, wipers, air conditioning, and warning alerts before exiting.
Picking up a car hire in Los Angeles can feel rushed, especially after a long flight or when the queue is moving. A calm, repeatable check protects you from disputes, helps you understand the vehicle’s controls, and avoids returning to the booth minutes later because something does not work. The best approach is a counter-to-car routine: confirm the paperwork, then do a thorough walkaround with time-stamped photos, then a short in-seat systems check before you leave the lot.
If you are collecting at the airport, allow extra minutes for this process. At busy hubs like LAX, pick-up areas can be crowded and lighting can be harsh, which makes small scuffs hard to see. Hola Car Rentals has information pages that help you plan your collection point and timing, such as car hire at Los Angeles LAX and fleet options like van hire at Los Angeles LAX, which can change what you need to check.
Before you reach the car: counter and paperwork checks
Start by confirming you are being given the exact vehicle class you expected, plus any paid extras. Mistakes are easier to fix before you walk away from the counter or kiosk. Check the driver name, dates, and return location, then confirm whether fuel is full-to-full, pre-purchase, or another policy. If you are unsure, ask for a clear explanation in plain language so there are no surprises at return.
Next, verify what the agreement says about damage reporting time limits. Some providers expect damage to be reported before you exit the car park. Also confirm what to do after hours, such as where to leave keys and how to document the drop-off. If you are collecting from a specific provider desk, the practicalities can vary, for example at Hertz at Los Angeles LAX or National at California LAX.
Finally, line up your evidence. Ensure your phone has storage and battery so your photos keep timestamps. Photos remain essential because they show detail when zoomed in.
Step 1: the must-have photos before you drive off
Your goal is to capture the car’s condition clearly from multiple angles, with enough detail to show existing chips, scrapes, dents, and cracked trim. Take more photos than you think you need. They are quick to take and can save hours later.
Do a full exterior loop first. Take wide shots of the front, back, and both sides, then four corner angles. Include the number plate in at least one photo to connect the pictures to that exact vehicle.
Then photograph detail areas. Move closer and photograph each wheel and tyre, including the alloy rims and sidewalls. Take clear pictures of the windscreen, mirrors, headlights, tail lights, and any sensors in the bumpers.
Finish with interior photos. Take a wide shot of the front cabin, the back seats, and the boot. Photograph the dashboard with the ignition on so the odometer and fuel gauge are visible. Also capture any existing stains, torn upholstery, or deep scratches on trim.
Step 2: fuel level, mileage, and dashboard evidence
Fuel disputes are common because a gauge needle can sit just under full, and photos taken later can look different after idling. Before moving the car, take a photo of the fuel gauge and the odometer in the same frame if possible. If the car uses a digital fuel bar, make sure the bars are legible.
If the agreement states “full”, the gauge should read full. If it is slightly under, photograph it and report it immediately so it can be recorded. Do the same for mileage. Your paperwork and dashboard should match closely, and if they do not, document both.
Step 3: damage notes, how to document properly, and who to tell
Photos are strong evidence, but it is even better when existing damage is acknowledged on the rental condition report. Compare what you see to the diagram or tick-sheet. If anything is missing, ask for it to be added, or add it yourself if the process allows, then get confirmation. Keep it factual and specific, for example “scratch 6cm on rear right door” rather than vague comments.
If you are collecting at LAX and staff are busy, it can help to document, then speak to an attendant before you pass the exit gate. The key is to make sure the report reflects the car’s real condition at pick-up, not later.
Step 4: key features and safety checks from the driver’s seat
Once the exterior and paperwork match up, sit in the driver’s seat and run a fast function test. This is not a mechanical inspection, it is a usability and safety check so you are not merging onto the 405 with a surprise warning light.
Start-up and warning lights. Turn the ignition on and check that no red warning lights remain on after start. If a tyre pressure light is on, photograph it and report it, because it can be an actual puncture or just a sensor reset issue.
Lights and visibility. Test headlights, indicators, hazards, and wipers and washers.
Climate and demisting. Test air conditioning and heater briefly, because reliable cooling matters in Los Angeles traffic.
Infotainment, Bluetooth, and charging. Pair your phone if you plan to use hands-free and locate USB ports. Take a photo of the screen if it shows an error message.
Controls you will need quickly. Find the handbrake type, bonnet release, fuel door release, and how to open the boot.
Step 5: tyres, tools, and practical Los Angeles considerations
Tyres are worth a quick look even if you are not a car expert. Check each tyre appears inflated and has no obvious bulges or cuts.
Open the boot and confirm what puncture support you have: a spare wheel, space saver, or an inflation kit. Photograph it.
If you are picking up outside Los Angeles and driving in, collection processes can differ. Hola Car Rentals also covers nearby airport pick-ups, such as car hire at Santa Ana SNA, which may have different lot layouts and lighting conditions for your photos.
Step 6: the final 60 seconds before you exit the lot
Before you pull away, take one last photo of the dashboard with the engine running, showing fuel and mileage, and confirm you have your agreement and any inspection slip. Set mirrors, adjust your seat, and programme your first destination only when stationary. If the exit gate has a booth, be ready to stop and show documents.
A good rule is simple: if you noticed it, photograph it. If it could cost money or affect safety, make sure it is written down and acknowledged. That routine is the difference between a smooth trip and a post-holiday email thread about damage you did not cause.
FAQ
Should I take photos even if the rental agent already inspected the car? Yes. Your own time-stamped photos back up the condition report and can clarify small marks that are easy to miss in the moment.
What is the most important single photo before leaving? A clear dashboard photo showing fuel level and odometer at pick-up, ideally with no warning lights displayed.
How do I photograph scratches properly in bright Los Angeles sun? Shoot from multiple angles, step closer for detail, and use shade if possible. Close-up stills usually capture fine marks best.
What if I spot damage after I have already left the car park? Stop somewhere safe as soon as possible, take detailed photos, and contact the rental provider immediately to record it against the agreement.
Do I need to check every feature if I am only driving locally? Focus on safety and essentials: lights, tyres, wipers, air conditioning, and how to refuel. Extra checks help, but these are the key ones.





























































































