Quick Summary:
- Photograph all sides, close-ups of scratches, and the roof line.
- Capture each wheel, tyre tread, kerb rash, and wheel arches.
- Take clear photos of windscreen, windows, mirrors, lights, and plates.
- Record fuel gauge, odometer mileage, dashboard warnings, plus the key fob.
Picking up a car hire in San Francisco often means tight car parks, busy kerbsides, and a quick handover. A short, methodical photo set protects you if pre-existing damage is questioned later, and it also helps you remember the vehicle’s condition when you return it after a few days of city driving, coastal fog, and motorway miles.
The goal is simple, create a time-stamped visual record that matches the inspection sheet. You do not need professional photos, but you do need consistency, good lighting, and enough coverage to show both the big picture and the details. If you collect your vehicle at the airport, allow five extra minutes before you join the exit queue. If you are collecting near the terminals, the guidance in San Francisco SFO car rental can help you plan for the pick-up flow and where you can safely stop for photos.
Before you start, set up your phone for proof-quality photos
A few settings make your images far more useful if there is ever a dispute. First, wipe the lens, then switch on location tagging if you are comfortable doing so, as it can support where the car was collected. Use normal photo mode and take at least one short video walkthrough as a backup, but do not rely on video alone, still images are easier to reference and share.
Stand still when you shoot, and take photos from slightly wider than you think you need, then add close-ups. If lighting is poor in a garage, use flash only for close detail, and avoid reflective glare on paint by angling the camera slightly.
Finally, create a dedicated album called “San Francisco rental pickup” so you can find images quickly later. If you are travelling as a couple or group, ask someone else to take a second set from different angles, it costs nothing and strengthens your record.
Exterior walkaround: your essential damage documentation
Start with a full 360-degree walkaround, taking broad shots that show the whole car and its position in the bay. Aim for eight wide photos, front, front-left, left side, rear-left, rear, rear-right, right side, and front-right. Include the ground and nearby bay markings if possible, as they help contextualise where you collected the car.
Then move to detail shots. Photograph every scratch, scuff, dent, paint transfer, and cracked trim you can find, even if it seems minor. Take each issue twice, one close-up for clarity and one medium shot that shows where it sits on the panel. For close-ups, place your finger near, but not touching, the damage to give scale.
In San Francisco, pay particular attention to bumpers and lower panels. Street parking and steep driveways can cause scrapes underneath the front lip, and bumper corners often show previous contact. If your car hire includes an SUV or a van, add a quick check of side steps and sliding-door tracks. For larger vehicles, you may find the van hire San Francisco SFO page useful for thinking through size-related checks before you depart.
Do not forget the roof. It is easy to miss, and damage there is hard to prove later without a photo. If you cannot safely see the roof, take an angled shot from each corner looking upward, and capture any roof rails, antennae, or racks.
Wheels, tyres, and wheel arches: the most disputed area
Wheel damage is one of the most commonly argued issues on return, especially kerb rash. In San Francisco, hills and tight turns make it easy to brush a kerb even when driving carefully. Photograph each wheel straight on, then take a close-up of the rim edge, and a third photo at a 45-degree angle to show depth.
Add a clear photo of tyre tread on each wheel. You are not measuring tread depth formally, but you want evidence that the tyres were in acceptable condition at collection. If you see sidewall bulges, cuts, or nails, capture them and report them before you leave the lot.
Next, photograph each wheel arch and the lower sill area behind it. Mudguards, plastic liners, and lower paintwork often show scuffs. If the car is wet from fog or rain, take extra shots, water can hide fine scratches. A quick wipe with a tissue can reveal marks, but never polish or rub aggressively, you only want to document what exists.
Glass, lights, mirrors, and number plates: clarity matters
Glass chips and cracks can be difficult to spot in a dim garage. Take photos of the windscreen from outside and inside, then angle the camera to catch reflections that reveal chips. If you find a chip, take multiple close-ups and include a wider shot that shows its location relative to the wipers or edges.
Photograph side windows, rear window, and any sunroof glass. Next, capture mirrors from the front and back to show the casing and the reflective surface. Then move to lights, headlights, fog lights, indicators, tail lights, reverse lights, and reflectors. Even if they work, you are documenting lens condition, cracks and moisture inside housings are important.
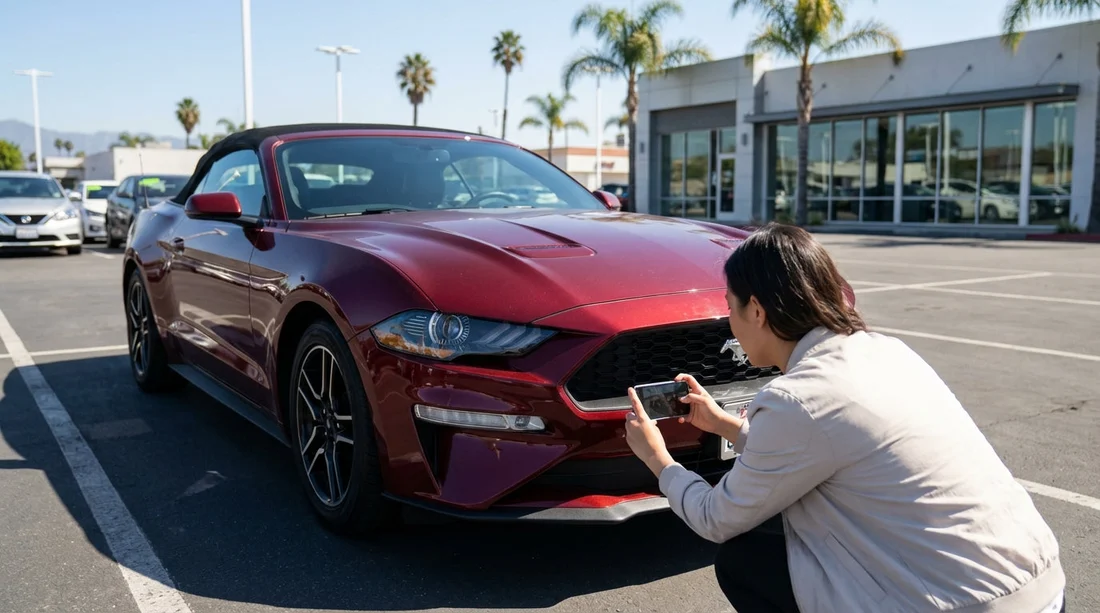
Finally, photograph front and rear number plates and the surrounding bumper area. This helps prove you had the correct vehicle and captures any plate-frame cracks or bumper marks.
Fuel, mileage, and dashboard status: the must-have instrument shots
Before you start the engine, take a photo of the dashboard with the ignition on, capturing the odometer and fuel gauge clearly. If your rental agreement is “full to full” or similar, the fuel photo is vital. If it is not exactly full, take an additional close-up to show the needle position, and note it mentally so you can match it on return.
Next, photograph any warning lights. Some cars display an alert briefly on start-up and then clear, so take a short burst of photos while the car powers on. If a tyre pressure light, service indicator, or low washer fluid warning stays on, document it and report it before you drive off.
If the car shows range remaining, capture that too. It can help explain fuel gauge movement after a short drive out of the airport area. For travellers collecting at the terminals, car hire airport San Francisco SFO provides context for airport driving and refuelling options nearby, which can reduce last-minute stress at return.
Interior condition: seats, carpets, and common wear points
Interior disputes are less common than exterior ones, but they do happen. Take wide shots of the front seats, rear seats, and boot. Then take close-ups of any stains, tears, burns, or heavy wear on seat bolsters. Photograph the headliner if it is marked, especially in vehicles that may have carried bikes or luggage.
Capture the dashboard, centre console, infotainment screen (off and on), and climate control panel. If there are sticky buttons, screen scratches, or broken trim, take clear photos. Then photograph the floor mats and the carpet underneath if possible. Sand and grit are common after a trip to Ocean Beach or the Presidio, so you want proof of how the flooring looked when you collected the car.
Do a quick check of the boot area, including the parcel shelf or cargo cover if present. If there is a spare wheel well or tyre repair kit, take a photo showing it exists and looks intact.
Keys, accessories, and paperwork: small items that cost money
Missing accessories can trigger fees. Photograph the key fob, including any labels or barcodes, and take a second photo showing any additional keys. If the car includes a parking pass, toll tag, or transponder, photograph it in place and close up. San Francisco area tolling is easy to misunderstand, so having a record of what device was provided is helpful.
Take a photo of the glovebox contents as found, especially the manual, registration, and any roadside assistance card. If there is a charging cable, phone mount, or USB adaptor included, photograph those too. Also capture the fuel type label inside the fuel door if it is present, it helps avoid misfuelling later.
Finally, photograph the rental condition report or check-out sheet, and ensure any damage you photographed is marked. If it is not, ask the agent to update it, then take another photo of the revised report. Keep the tone factual and calm, you are aligning the paperwork with what you can already see.
A simple shot list you can follow in five minutes
If you want a quick routine, use this order, wide exterior loop, detail damage loop, wheels and tyres, glass and lights, dashboard fuel and mileage, interior wide shots, accessories and paperwork. The first loop proves overall condition, the later steps fill gaps that often cause disputes.
If you are continuing your trip beyond San Francisco, for example collecting near Silicon Valley, the expectations are similar. The pick-up process outlined on car rental San Jose SJC can help you plan time for this same checklist at another airport location.
Where to take photos around San Francisco without hassle
At airport rental centres, try to take photos in the bay before you join the exit line, but do not block traffic. If the garage is very dark, drive only to the nearest safe, well-lit area within the facility, then finish your photos. For city pick-ups, find a quiet spot away from moving traffic, and be mindful of cyclists and delivery vehicles.
Fog and low sun can create glare, so change angles rather than rushing. If the car is wet, take more close-ups of panels that commonly hide scratches, doors, bumpers, and wheel arches. If you spot anything significant, report it immediately rather than hoping it will be fine later.
How many photos are enough, and how to store them
A good set is usually 40 to 70 photos plus one short video. That may sound like a lot, but it is quick when you follow a pattern. Quality matters more than quantity, make sure key areas are readable, especially the odometer and fuel gauge.
Back up the photos the same day. Use your phone’s cloud backup or send the album to a travelling companion. If a dispute ever arises, you will want the originals with timestamps intact. Avoid heavy editing or filters, as they can make images look less credible.
FAQ
Do I really need photos if the agent already inspected the car? Yes. The inspection sheet can miss small issues, and your own photos provide a time-stamped record of the condition when you took possession.
Which photos matter most for a car hire in San Francisco? Prioritise wide exterior shots, close-ups of any damage, each wheel rim, windscreen condition, and a clear dashboard photo showing fuel level and odometer.
Should I take a video as well as photos? A short walkaround video is helpful for context, but still photos are easier to reference for specific scratches, chips, and dashboard readings.
What if I notice damage after I have already left the car park? Pull over somewhere safe as soon as possible, take photos immediately, and contact the rental provider to record the issue against your agreement.
How do I photograph the fuel gauge so it is unmistakable? Turn the ignition on, steady the camera, and take two shots, one wide showing the whole cluster, and one close-up focused on the fuel needle and gauge markings.


