Quick Summary:
- Photograph all four corners, then close-ups of any marked damage.
- Capture wheels, tyres and kerb rash, plus the windscreen edges.
- Shoot the interior surfaces, seats, boot and any stains.
- Match each photo to the condition report, time-stamped before exit.
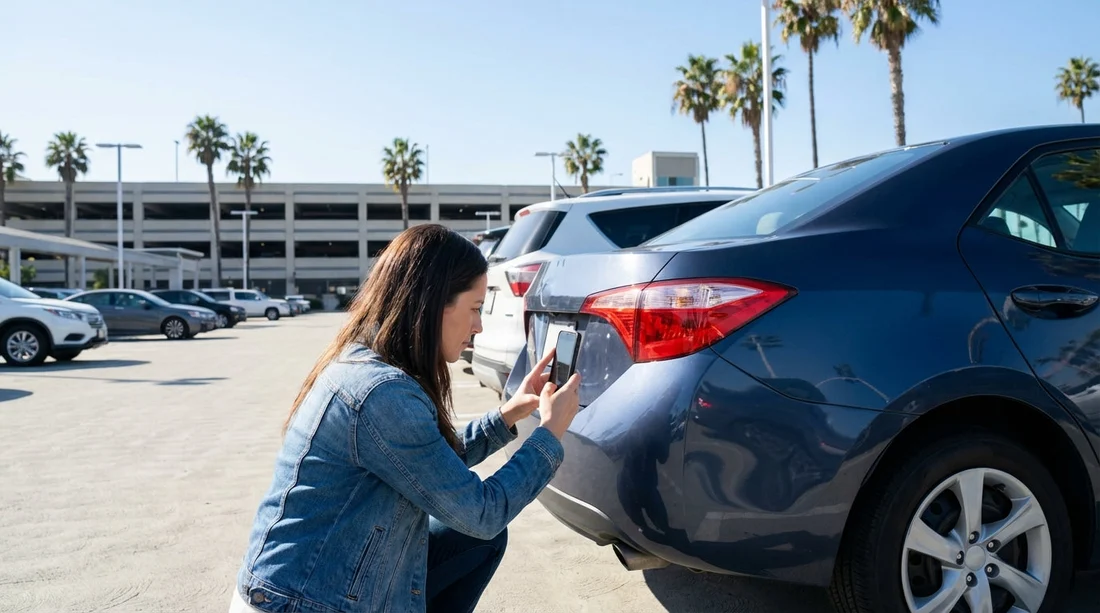
Picking up a car hire in Los Angeles often feels fast-paced, especially at airport desks and busy curbside collection zones. The condition report is your shared reference point with the rental company, but it only helps if the notes and diagrams match the vehicle you are actually driving away in. A clear, systematic set of photos taken before you leave makes it easier to show what was already present, and it can speed up discussions if a query appears later.
This checklist is designed to mirror what is usually on a rental car condition report, exterior panels, wheels and tyres, windscreen and glass, interior condition, and fuel and mileage. The goal is not to create an art project, it is to create evidence that is legible, complete, and clearly taken before departure.
If you are collecting around LAX, build in five extra minutes for documentation. It is particularly useful for busy locations such as car hire Los Angeles LAX and car rental California LAX, where lighting and traffic flow can make a quick walkaround feel rushed.
Before you start: set up your photos so they count
Most disputes happen because photos are too blurry, too dark, or too vague to identify the panel in question. Use these basics first.
Turn on time and location details. If your phone supports it, enable the setting that stores capture time and location in the image data. Even if you never share that data, it helps you keep photos organised and shows they were taken at pickup.
Use wide then close. For every issue, take one wide shot showing where it is on the car, then a close-up that shows the scratch, dent, scuff, crack, or chip clearly.
Use steady light. In Los Angeles garages, lighting can be patchy. If you are in a dim structure, take an extra shot with the phone flash and one without. Avoid glare by changing angle rather than zooming.
Match the report sections. Many condition reports show a car outline with marked areas. Photograph in the same order as the form. This makes it easier to point to the exact panel if you need to compare later.
Exterior photo checklist: panels, paint, bumpers, lights
The exterior is where most marks appear on the report. Aim for a consistent set, then add extras for anything you notice.
1) Full walkaround set (eight shots). Take front, rear, left side, right side, and four corner angles. Corner angles help show bumper edges and wheel arch scuffs that straight-on photos can miss.
2) Roof and bonnet. If you can safely do so, photograph the roof and bonnet. In Los Angeles, outdoor parking can mean tree sap, bird droppings, or sun-faded clearcoat. A quick top-down shot helps show what was already there.
3) Front bumper and grille close-ups. Look for curb taps, scraped lower lips, and number plate bracket damage. Photograph any scrapes, and include a wide shot showing the whole front bumper for context.
4) Rear bumper and boot edge. Scratches often happen at loading height. Photograph the rear bumper top edge and the boot lip. If there is a protective strip, photograph that too so scuffs are clearly on the strip, not the paint.
5) Door panels and handles. Photograph each door in a wide shot. Then check for door dings and scratches near handles. Take close-ups of any dents, even small ones, because they are hard to prove later without clear evidence.
6) Mirrors. Mirrors are frequently chipped or scuffed. Take a close-up of each mirror housing and mirror glass, especially the outer edge.
7) Lights. Photograph headlamps, tail lamps, indicators, and any fog lights. You are looking for cracks, moisture inside the lens, or missing trims. A wide shot plus one close-up per light cluster is usually enough.
8) Under-bumper lower areas. Crouch and take one photo of the lower front and lower rear. These areas can be scraped on ramps and parking stops. Low-angle shots are often the only way to show pre-existing damage.
Wheels and tyres: the most overlooked, most disputed area
Condition reports often include wheels because curb rash is common, and it is easy to miss when you are focused on bodywork. In Los Angeles, tight kerbs and multi-storey car parks can add risk, so document wheels thoroughly.
1) Each wheel face. Take a straight-on photo of all four wheels. Make sure the full rim edge is visible. If there is rash, take a close-up showing the scuffed section and a wide shot showing which wheel it is.
2) Tyre sidewalls and tread. Take one angled shot per tyre showing the sidewall and tread. Look for sidewall bubbles, cuts, or chunks missing. These can be blamed on potholes or kerb impacts, so it helps to have a baseline image.
3) Valve stems and wheel trims. If the car has plastic trims or hubcaps, check for cracks and missing pieces. Photograph anything loose or damaged so it is clearly pre-existing.
4) Spare wheel kit if accessible. If the condition report mentions a spare, tyre inflator, or jack, photograph the boot storage area briefly. If it is sealed or not accessible, do not force it, just note what you can see.
When you arrange car hire through brands and desks serving the region, such as Dollar car rental California LAX, wheel documentation is especially useful because alloy scuffs are a common post-return query.
Windscreen and glass: chips, cracks, and wiper marks
Glass damage can be subtle, and small chips can turn into cracks with heat and road vibration. Los Angeles driving can include freeway speeds and debris, so document glass before moving.
1) Windscreen full-frame. Take one photo from outside showing the whole windscreen. Then take one from the driver’s seat looking out. This captures both the perimeter and the driver’s view area.
2) Windscreen edges and corners. Chips often start near the edges. Photograph each lower corner and the top edge if possible. Focus on clarity, even a small chip should appear sharp.
3) Wiper sweep area. Take a close-up where the wipers rest, plus a shot of the swept area in front of the driver. Look for fine scratches or wiper burn marks that can show as haze in sunlight.
4) Side windows and rear glass. One photo per side and one for the rear window is usually enough, unless you see scratches, tint bubbles, or cracks. Include the rear defroster lines if visible, because damage there can be hard to prove without a clear image.
5) Sunroof or panoramic roof glass. If the car has one, take a quick shot from outside and inside. Check for chips along the leading edge.
Interior checklist: match what the report actually lists
Interior notes are often brief on condition reports, but stains, tears, smells, missing accessories, or warning lights can matter. Keep photos tidy and avoid capturing personal details of staff or other customers.
1) Driver’s area. Photograph the steering wheel, dashboard, and instrument cluster with the car on. Capture any warning lights that remain on after startup. Also photograph the odometer reading if the report includes mileage.
2) Seats and upholstery. Take a photo of each seat base and backrest. Look for tears, cigarette burns, heavy wear, and stains. If you spot a mark, take a close-up that shows fabric texture clearly.
3) Carpets and mats. Photograph the front footwells and rear footwells. Pull the mat slightly to show if the carpet underneath is stained. Only do this if it is quick and safe in the pickup area.
4) Centre console and infotainment screen. Take a clear photo of the screen condition, knobs, and ports. Scratched screens or missing covers are commonly overlooked.
5) Door cards and thresholds. Photograph each door panel and the scuff plate area at the bottom. Shoe scuffs and gouges are common, and thresholds can be marked as damage on return if you cannot show they were pre-existing.
6) Boot or cargo area. Photograph the boot floor, sides, and the parcel shelf if present. This is important if you are loading luggage, because scuffs and tears can happen quickly and may be questioned later.
7) Accessories the report mentions. If the report lists a USB cable, child seat anchor covers, a parcel shelf, or a cargo cover, photograph what is present. If something is missing, photograph the empty space where it should be.
Fuel, mileage, and paperwork: the quick evidence that saves time
These images are often the simplest, and they are the ones most likely to resolve confusion.
1) Fuel gauge. Photograph the fuel gauge with the ignition on. If the report says full to full, your photo should clearly show the needle or digital bars. If it is not full, take a second photo that also shows the dashboard context.
2) Odometer. Photograph the odometer reading at pickup. This helps if mileage limits, one-way moves, or service intervals come up later.
3) Condition report itself. Take a photo of the report page, including the car diagram and any tick boxes. If it is digital, screenshot the final version after you have reviewed it. This ties your vehicle photos to the exact document you were given.
How to align your photos with the condition report layout
To make your set easy to use, organise it in the same categories the report uses. A simple order works well: front, left, rear, right, roof, wheels, glass, interior, fuel and mileage, then the report. If you find damage, repeat the pattern: wide context shot first, close-up second, then move on.
When you later need to reference an image, you will be able to say, for example, “left rear wheel close-up” or “front bumper lower lip” and find it quickly without scrolling through random angles.
If you are travelling as a group, ask one person to photograph while another checks the report. This reduces missed items and keeps the process quick enough for busy Los Angeles pickups.
Los Angeles-specific pickup tips: light, traffic, and tight spaces
Los Angeles pickup locations range from open lots to multi-level garages. Here is how to adapt your checklist without losing coverage.
Garage lighting. Use more corner-angle shots and add flash variants. Scratches often disappear in shadow and only show under direct light.
Sun glare. If you are outdoors, walk around the car and re-shoot any panel where the sun reflection hides the paint surface. A slight change in angle usually reveals scuffs.
Tight lanes. If you cannot step back for a full side shot, take overlapping photos: front half of the side, then rear half. Make sure the door seams are visible so the panels can be identified.
Short dwell time. Some areas discourage lingering. Prioritise: all four corners, each wheel, windscreen, fuel gauge, odometer, and the report photo. Then add interior and close-ups as time allows.
For travellers also considering alternatives to LAX, desks around Orange County can be part of the same planning, including car hire airport Santa Ana SNA. The same photo checklist applies, regardless of pickup point.
What to do if you find damage not on the report
If you spot something that is not marked, photograph it clearly and compare it to the report diagram. If the report is paper, ask staff to add a note and initial it, and keep a copy or a photo of the updated page. If the process is digital, request that the damage is added to your agreement or inspection record, then screenshot the updated entry.
Keep your tone factual and specific. Describe location and size, for example, “scratch on right rear bumper corner, about 4 cm” rather than general statements. Your photos should support the wording.
FAQ
Should I photograph every tiny scratch on a car hire in Los Angeles? You do not need to photograph every micro-mark, but you should capture anything visible at arm’s length, anything on edges, and anything not already marked on the report.
How many photos is enough for a rental car condition report? A solid baseline is 25 to 40 photos: eight exterior walkaround shots, four wheels, key glass shots, interior overview, fuel, odometer, plus close-ups of any damage.
Is a video better than photos for documenting condition? Video can help as a quick walkaround, but photos are usually clearer for proving a specific scratch, dent, or chip. If you do both, take photos of all notable items.
What if the car is wet or dirty at pickup? Take photos anyway, then add close-ups where you can see through the dirt or water. If possible, ask for a quick wipe of key areas like the windscreen and wheels.
Do I need to photograph the keys and accessories too? If the report lists items like a second key, toll tag, or charging cable, photograph what you receive. It helps confirm what was provided at pickup and avoids confusion at return.


