Quick Summary:
- Photograph all four sides and corners, plus the roofline, in daylight.
- Close up every scratch, dent, scuff, and paint chip with scale.
- Capture wheels, tyres, glass, lights, and mirrors from multiple angles.
- Record interior condition, mileage, fuel level, warning lights, and keys.
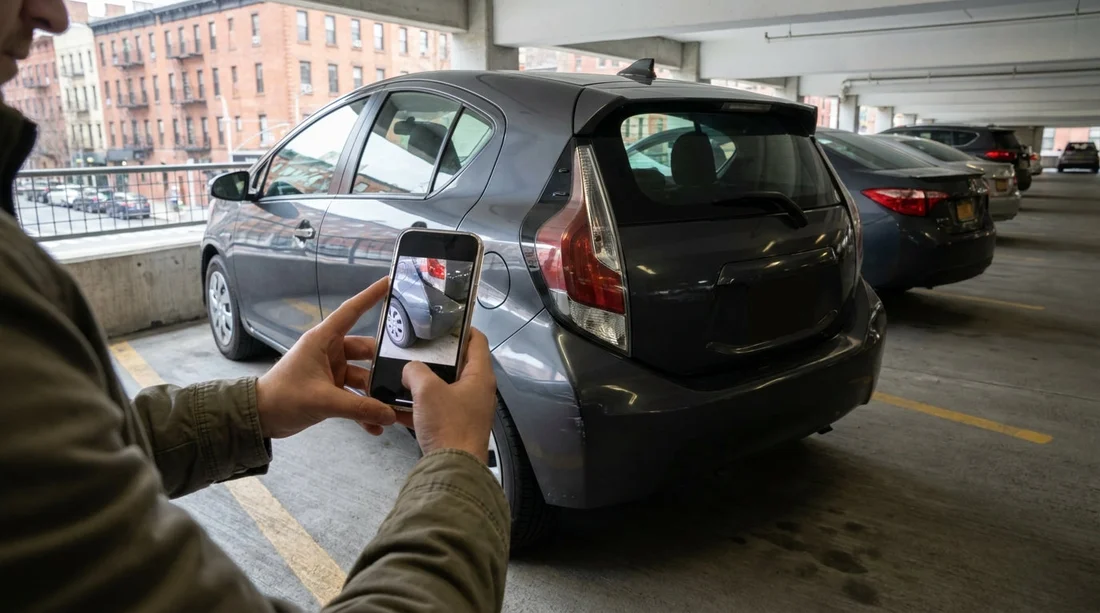
When you collect a car hire in New York, the fastest way to prevent later disagreement is to create a clear, time-stamped photo record before you leave the lot. The aim is simple, match what you see to the condition report, then keep proof of anything missing from that report.
If you are collecting from a major terminal location, you may be juggling luggage, signage, and traffic flow. Locations like car rental New York JFK can be hectic at peak times, so do your photo set as soon as you reach the car, before loading bags or pulling out.
Your practical photo checklist at pick-up
Use your phone’s standard camera, set to high resolution, with flash on auto. Turn on location tagging if you are comfortable, and make sure the timestamp is correct.
1) Full exterior coverage, then work inwards
Begin with wide shots that prove you photographed the whole car, not just a few close-ups. Stand back far enough to include the full panel and wheel in frame.
Take these wide shots: front, rear, driver side, passenger side. Then take four corner angles, front-left, front-right, rear-left, rear-right. If you can safely do so, add a roofline shot, especially for SUVs and minivans where roof scrapes happen in garages.
Next, photograph the number plate and any fleet sticker or barcode on the windscreen or door jamb. This links the images to the exact vehicle you were given. If your car hire is arranged through a partner brand at the terminal, such as Dollar car rental New York JFK, that vehicle ID photo helps if you later need to match photos to a receipt or inspection report.
2) Panels and paint: close-ups that prove scale
After wide coverage, move panel by panel and document imperfections. In New York, typical pre-existing marks include bumper scuffs, door dings from tight parking, and scratches near door handles from rings or keys.
Photograph these areas closely: front bumper, rear bumper, bonnet, boot, both front doors, both rear doors, both quarter panels, rocker panels below doors, and the area around fuel door.
For each defect, take at least two photos, one close and one medium distance. In the close shot, include a reference for scale such as your fingertip pointing near the mark, without covering it. Take the medium shot from a step back to show which panel the damage is on.
3) Wheels, tyres, and under-bumper scrapes
Wheel and tyre photos are essential because curb rash is common, and it can be difficult to prove it was there before you drove away. For each wheel, take a full-wheel photo straight on, then two angled shots to show the rim edge.
Do not forget: photograph tyre sidewalls for cuts or bulges, and capture the tread if it looks low or uneven. Finally, photograph the lower edge of the front bumper and the rear bumper, where scrapes from steep ramps often appear.
If you are picking up outside New York and driving in, you may still be doing the same checks at an airport location. The process is identical whether you collect at JFK or across the river at Newark, such as car rental New Jersey EWR.
4) Glass, lights, and mirrors
Glass damage can be subtle, so use angled shots that catch reflections. Take photos of the windscreen from inside and outside, plus the rear window, and each side window. For each, do one wide image and one close-up if you spot chips or cracks.
Also photograph: headlamps, tail lamps, indicators, and reflectors. Take at least one photo with lights switched on to show they function and to highlight lens cracks. For mirrors, capture the housing and the glass, including any scuffs on the outer cap.
5) Interior condition, seats, and high-wear touchpoints
Once the exterior is covered, open each door and take interior photos before anyone sits inside. New York rentals often see lots of short trips, so interior wear and stains can be common.
Photograph these interior areas: driver seat bolster, passenger seat, rear seats, headliner, door cards, armrests, and centre console. Take close-ups of any tears, stains, burn marks, or deep scratches on plastics.
Lift floor mats if possible and photograph the carpet beneath, especially in winter months when road salt can leave marks. Check the boot or cargo area for scuffs or missing parcel shelves. The same applies if you are collecting a people carrier, like options listed under minivan rental New Jersey EWR, where rear trim is frequently scratched by luggage.
6) Dashboard, mileage, fuel, and warning lights
Before moving the car, sit in the driver’s seat and take a clear photo of the instrument cluster with ignition on. This is one of the most valuable images you can have.
Capture in one or more photos: odometer mileage, fuel gauge, and any warning lights. If a warning light is present, mention it to the desk or kiosk support immediately so it can be noted.
How to match your photos to the condition report
After you take the photos, compare them to the condition report line by line. If the report is on paper, photograph the report itself so you can prove what you were given. If it is in an app or kiosk summary, take screenshots.
If something is not listed, return to the counter or call the lot attendant while you are still on site. It is much easier to correct the record before you exit.
FAQ
Q: How many photos should I take at pick-up in New York?
A: Aim for 25 to 40 photos, including wide exterior shots, all four wheels, glass, and dashboard readings.
Q: Should I take a video as well as photos?
A: Yes, a slow walkaround video can complement photos, but rely on photos for sharp close-ups of scratches, dents, and wheel rash.
Q: What if I notice damage after leaving the lot?
A: Stop as soon as it is safe, photograph the issue in good light, then contact the rental provider immediately to report it and ask for the record to be updated.
Q: Do I need to photograph the roof and underbody?
A: Photograph the roofline if you can safely do so, especially on taller vehicles. Underbody photos are optional, but do capture lower bumpers and sills.
Q: Is photographing the condition report itself useful?
A: Yes, a photo or screenshot of the report links your images to the documented inspection and helps resolve discrepancies at return.


